
Chapter 5 · Film choice & color filtration in front of the lens
Developing Black and White: Choosing Film, Controlling Color
Black and white never began in the darkroom — it began when you loaded the film. ISO 100 for fine grain in the studio, ISO 400 as the all-round reportage film, high-speed stock for the night. And it began in front of the lens: a color filter decided how colors turned to gray. The most famous case is Adams’ “Monolith, the Face of Half Dome” from 1927: instead of the usual yellow filter, he screwed a deep red glass onto the lens — the blue sky dropped to near-black, and a rock face became drama. (This image is also a private work; the technique behind it belongs to everyone regardless.)
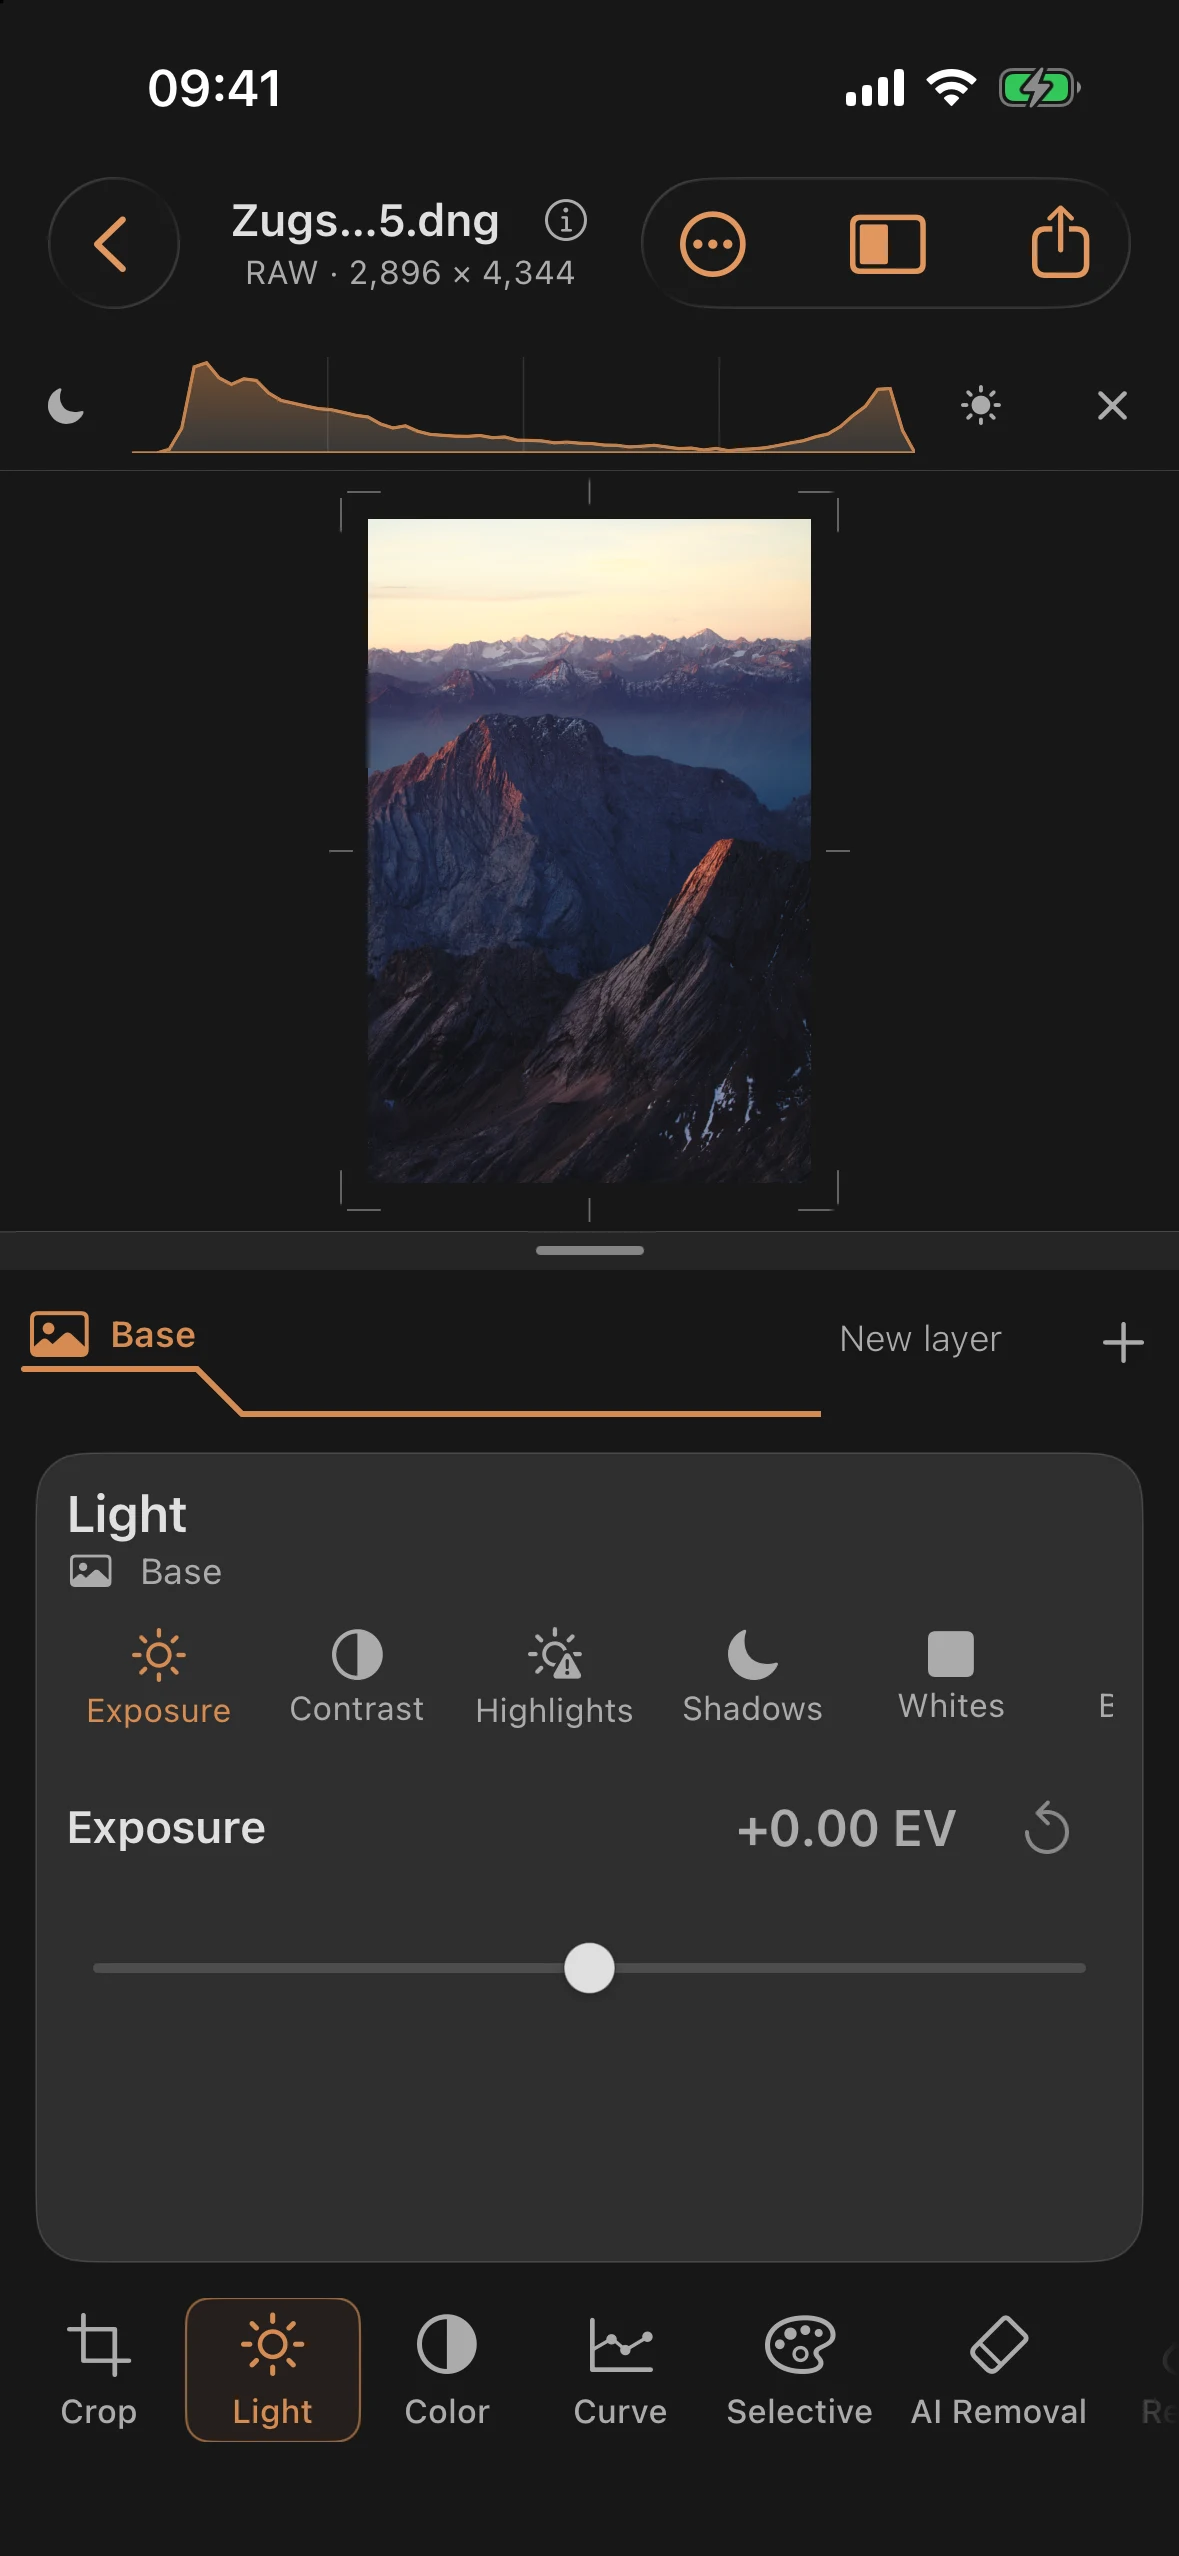
A red filter does nothing magical: it lets red light through and absorbs blue — blue goes dark, red goes light. Digitally, you dial in that same translation directly on the colors, before the image turns monochrome. Since the NARA scans are already finished black-and-white prints, this chapter works with the app’s built-in color sample image: an evening view from the Zugspitze, shot in RAW.
Step 1: Seeing the Color
Load the sample image and sit with the color for a moment: the last sunlight lies warm on the ridge lines, and everything else — shadowed flanks, haze, the range on the horizon — is deep blue. For the translation to gray, that means: pull the blue-turquoise band down and you darken shadow and haze while the warm light stands — exactly the separation a red filter would have produced.
Step 2: Choosing the Red Filter
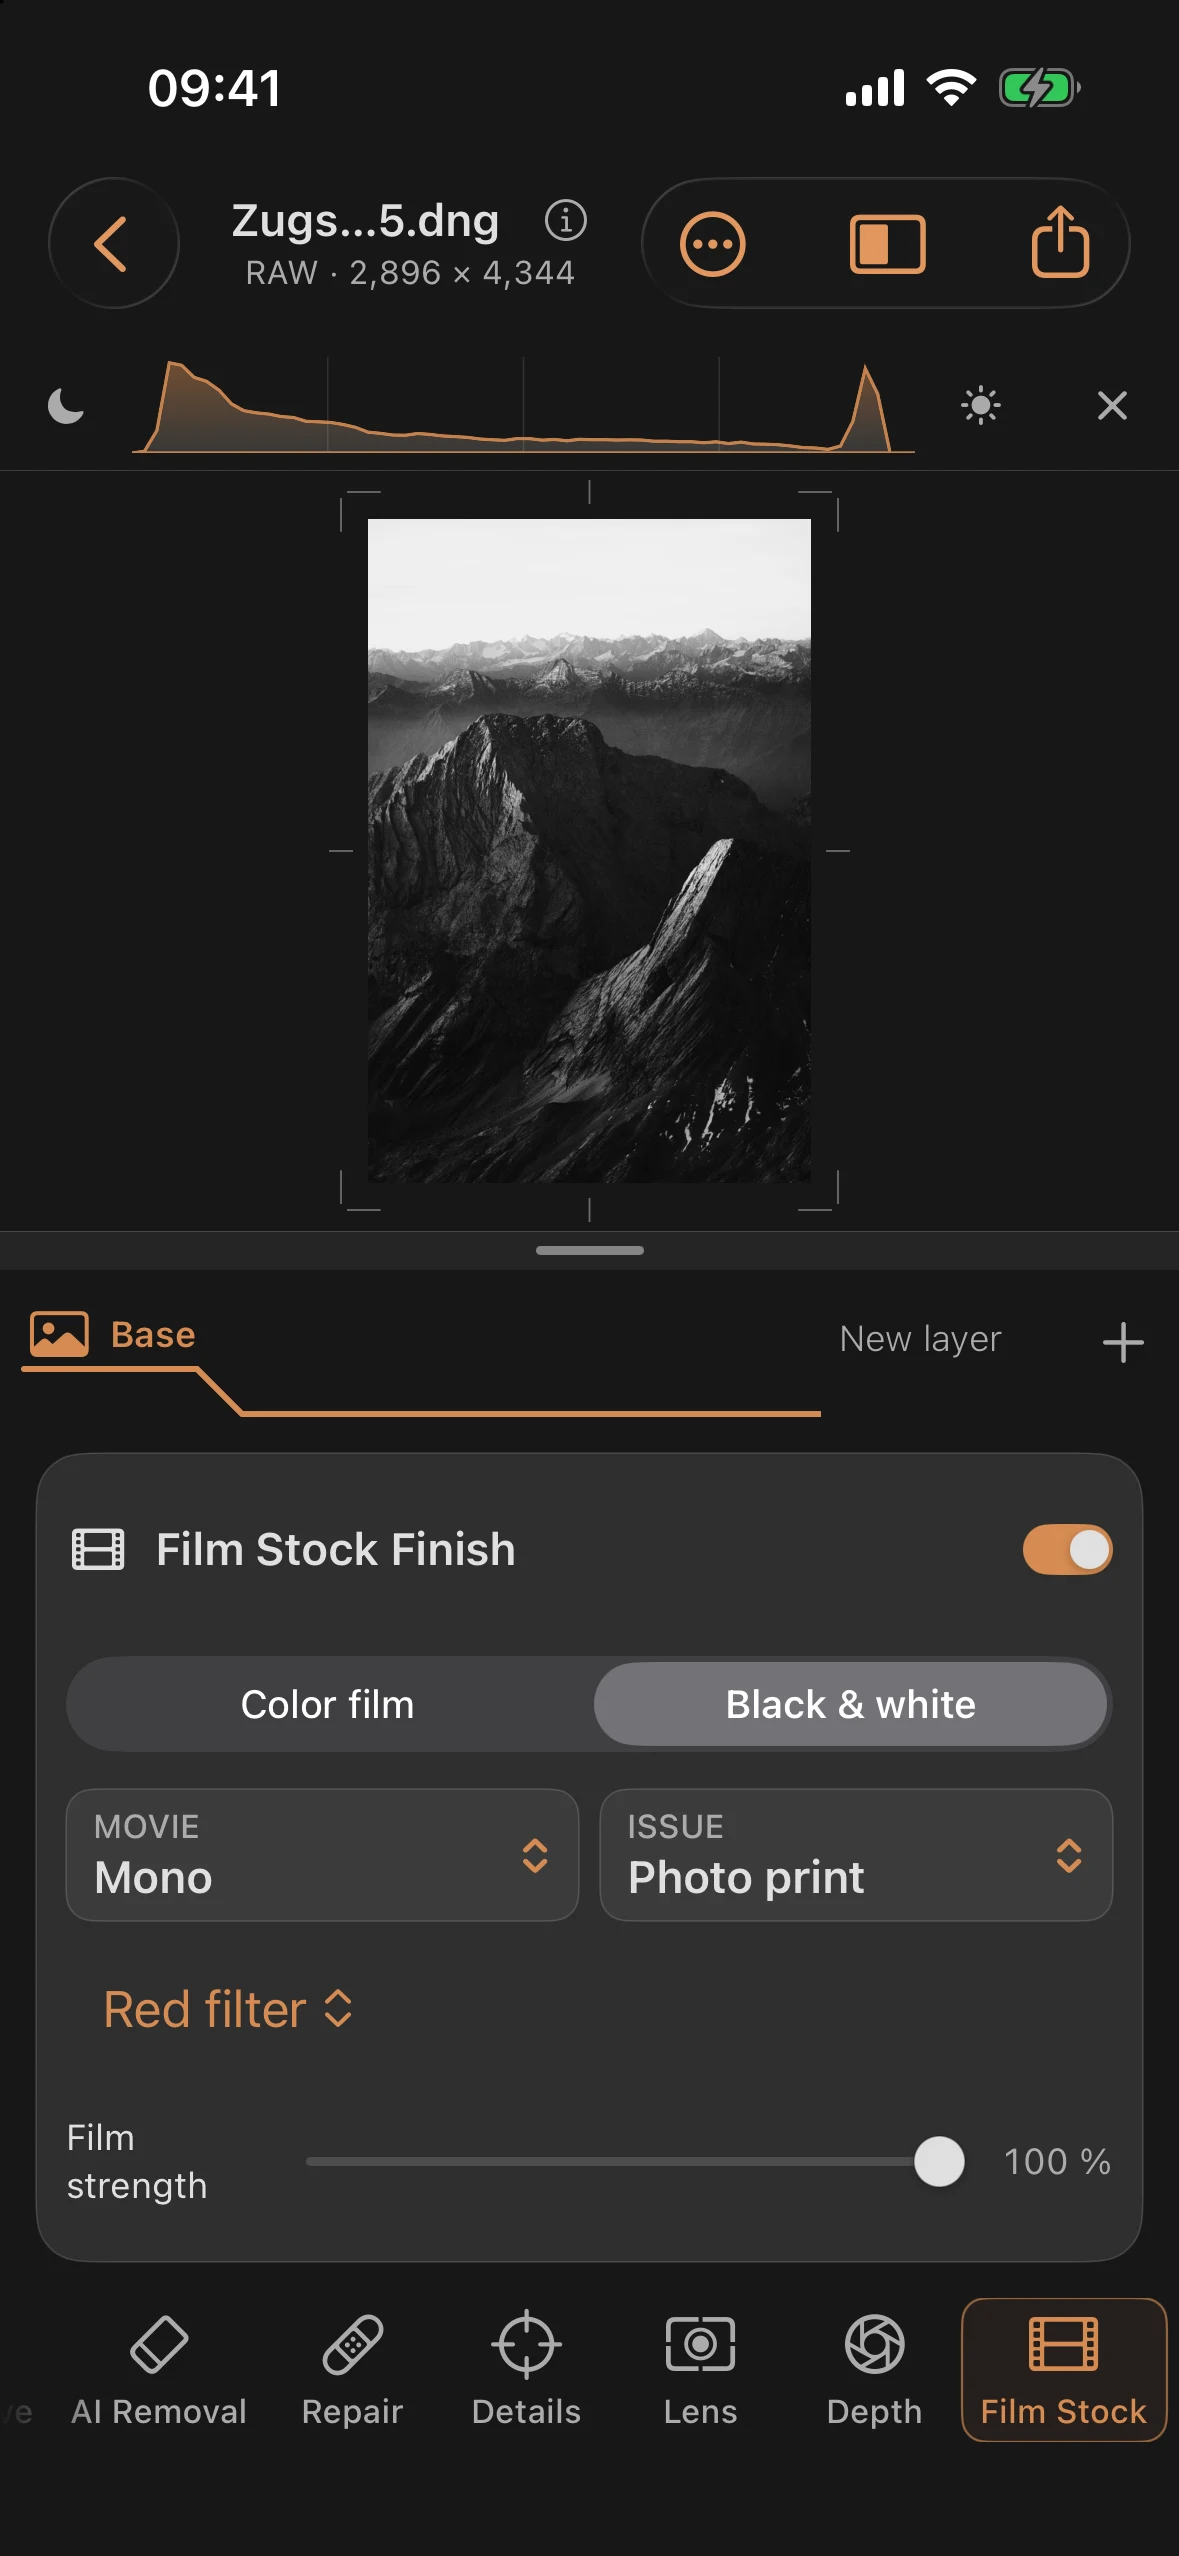
Open Film Stock → Black & white and choose Mono 400. Select Red filter as the lens filter. The film pipeline applies it before converting the image to gray: blue shadows and haze become darker, while warm ridge light stands out. Briefly compare it with No filter, then return to the red filter.
Use these settings for the clean intermediate image:
| Setting | Value |
|---|---|
| Film | Mono 400 |
| Lens filter | Red filter |
| Output | Photo print |
| Photographic paper (Development & Print) | Neutral Photographic Paper |
| Film strength | 100% |
| Film Grain | 0% |
| Halation (Emulsion & Light) | 0% |
The image is already black and white. The filter controls how existing colors become gray; it cannot produce the same separation from an already monochrome scan. Yellow filter and Orange filter are gentler alternatives when red is too strong for the subject.
Step 3: Shaping the Print and Grain
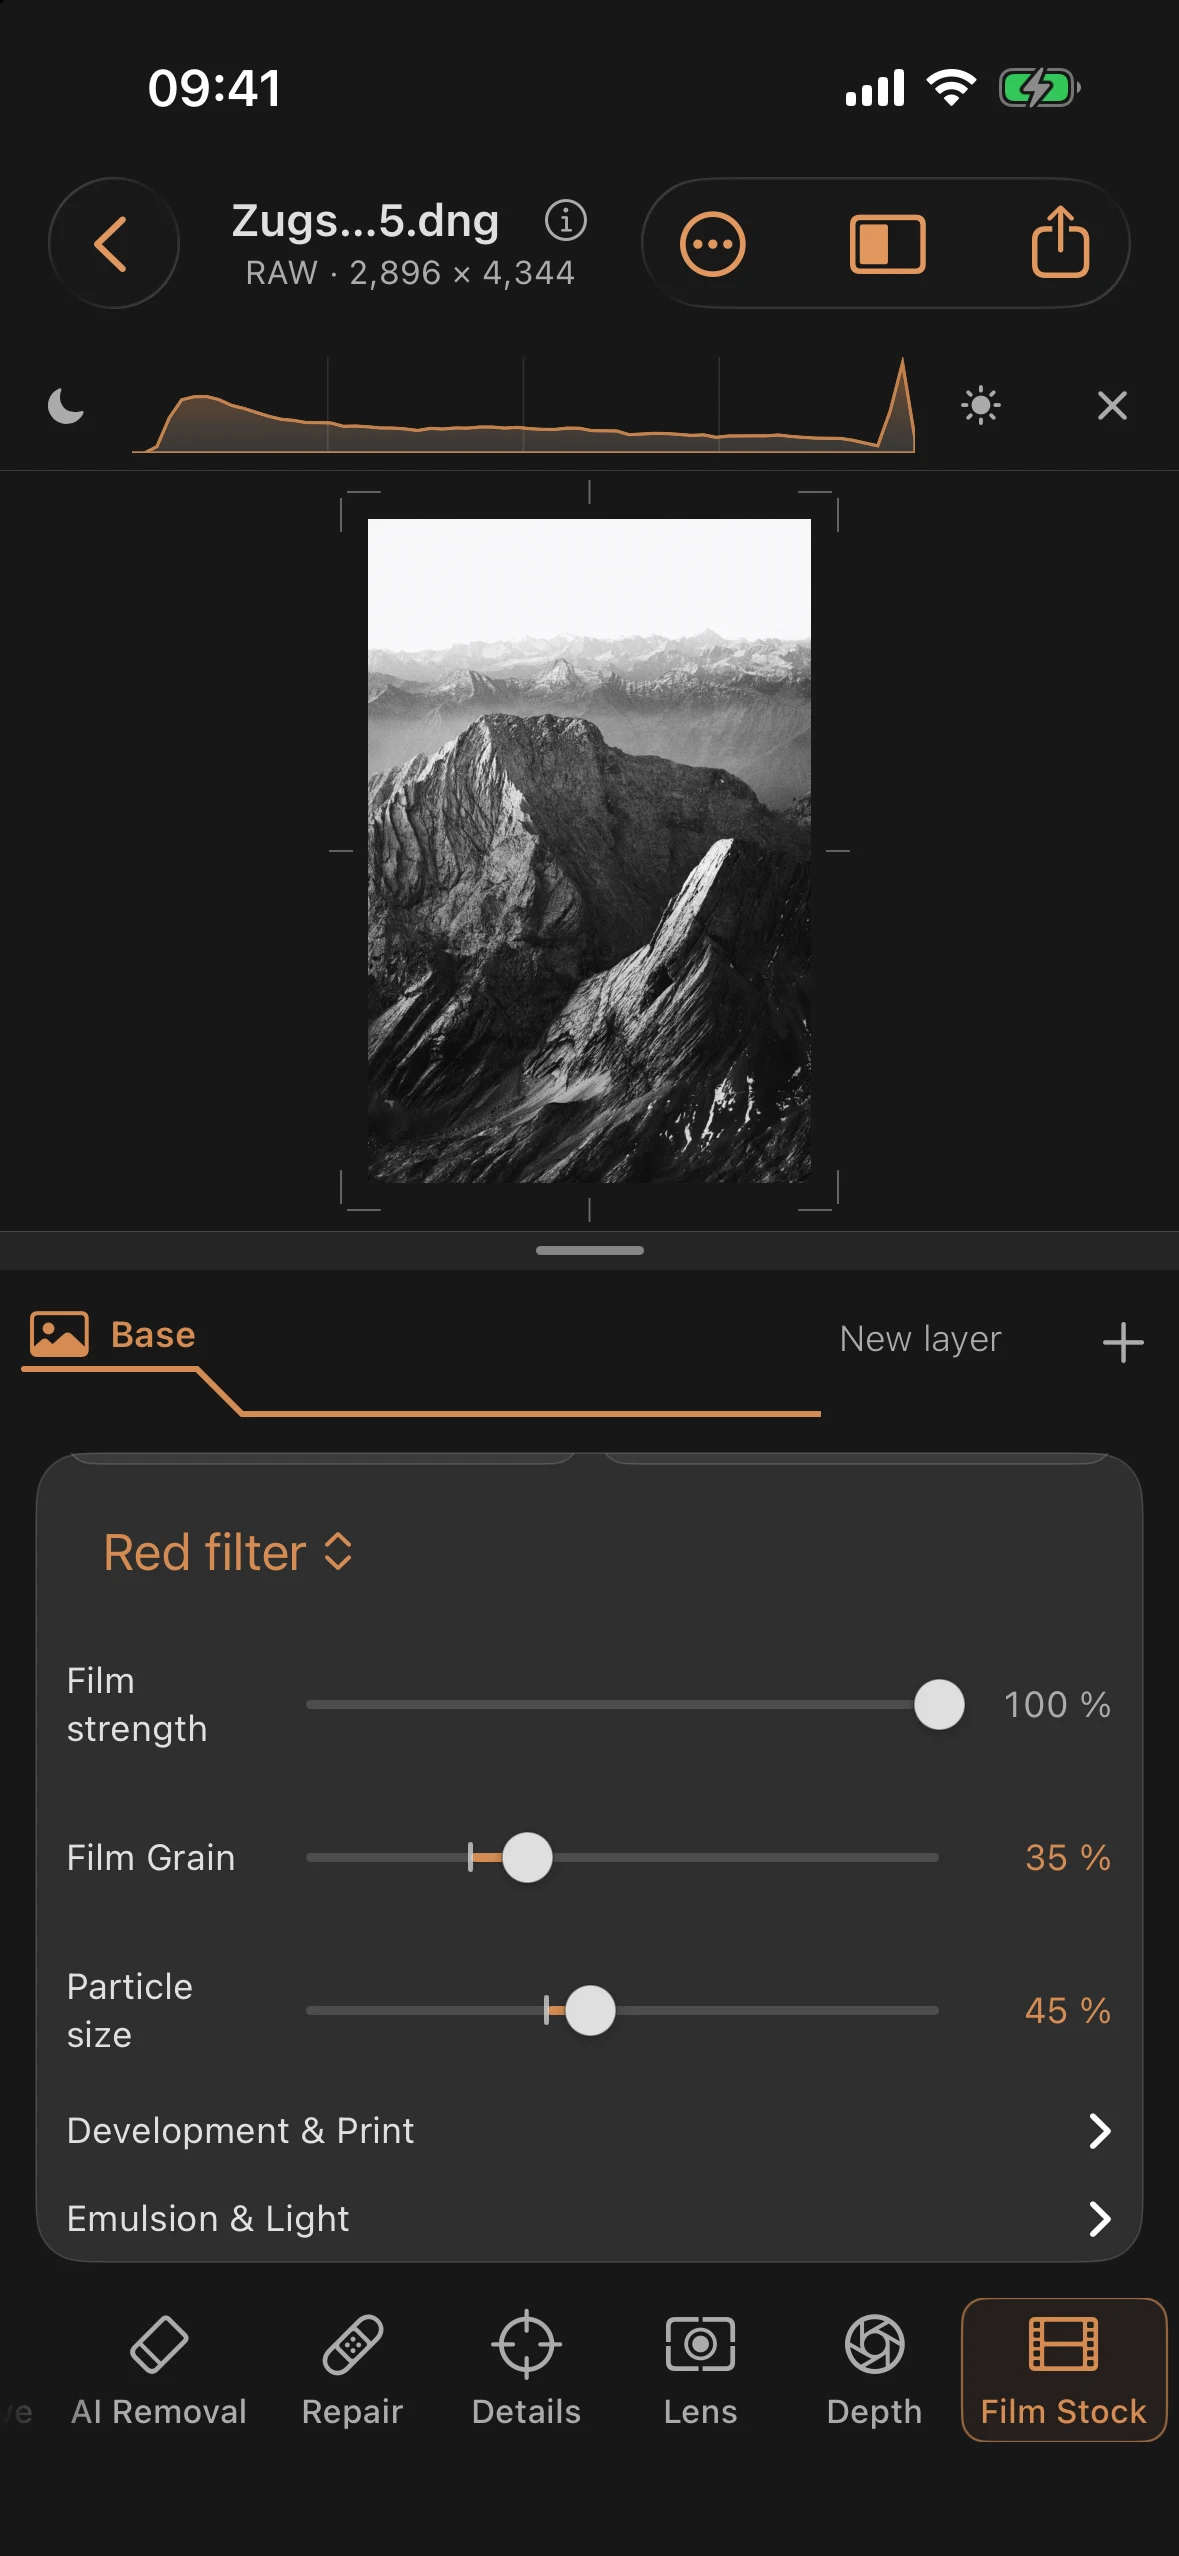
Keep Mono 400 and Red filter enabled. Under Development & Print → Photographic paper, choose High-Contrast Photographic Print and add grain. Leave the paper grade at 2:
| Setting | Value |
|---|---|
| Film | Mono 400 |
| Lens filter | Red filter |
| Output | Photo print |
| Photographic paper | High-Contrast Photographic Print (“dense”) |
| Paper grade | 2 |
| Film strength | 100% |
| Film Grain | 35% |
| Grain size | 45% |
| Halation | 10% |
| Exposure (Light) | +0.30 EV |
| Shadows (Light) | +25 |
The slight lift in exposure and shadows keeps shadow detail readable on the higher-contrast paper. Zoom in to judge the grain and adjust its strength for the intended output size.
Before and after
Before
After
The lens filter controls the gray conversion, paper and grade shape the contrast, and film grain adds texture. Each choice remains independently adjustable and reversible.