
Chapter 4 · Graduated ND filter & burning in the sky
The Graduated ND Filter: Saving Skies Like in Front of the Lens
Landscape photography has a built-in problem: the sky is almost always several stops brighter than the land below it. Film couldn’t hold both at once — so photographers slid a graduated neutral-density filter in front of the lens: neutral gray glass on top, clear on the bottom, a soft transition in between. The sky got dimmed down at the moment of exposure, the land stayed untouched. If you didn’t have a filter with you, you made up for it later at the enlarger and burned in the sky instead — Chapter 2 says hello.
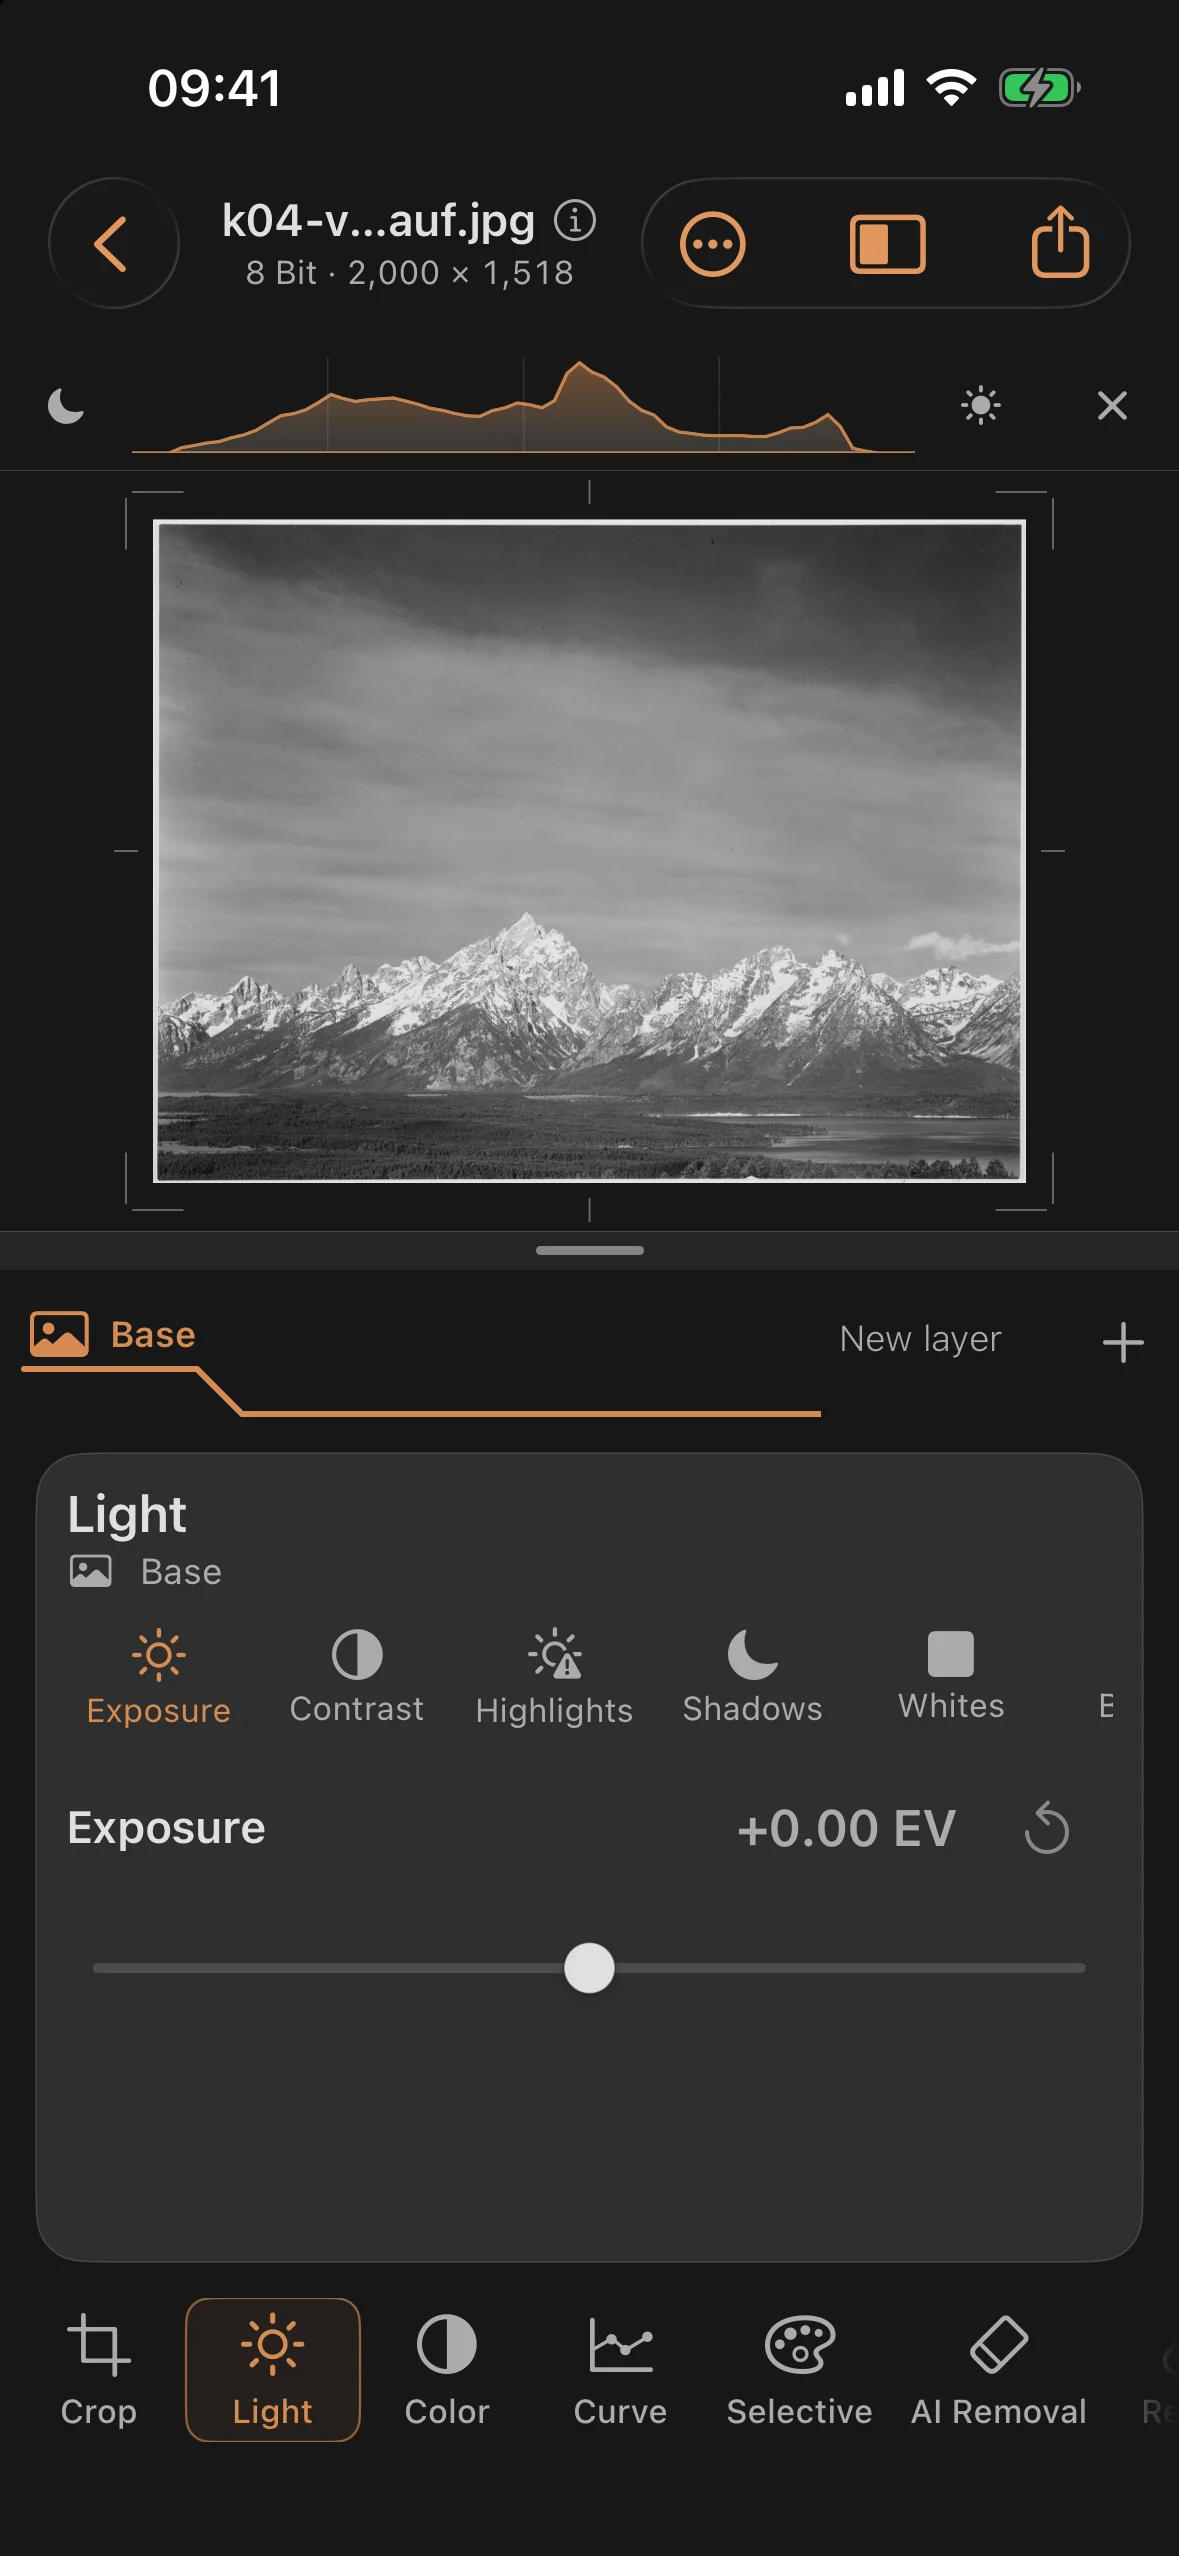
In Mobile Darkroom, this optic lives in the filter cartridge: a Graduated filter in Grey behaves like its physical model and drops in fresh with the filtered half on top. The practice image is the view from Signal Mountain across Jackson Lake to the Teton range — forest and lake below hold up fine, the sky above is nearly white in the scan.
Step 1: Spotting the Falloff
Look at the brightness distribution: the lower half of the image — forest, lake, mountain flanks — sits cleanly in the midtones and shadows. The upper half runs out into nothing toward the top. That falloff from bottom to top is exactly the case for a graduated filter, not a global slider.
Step 2: Dropping In the Graduated ND
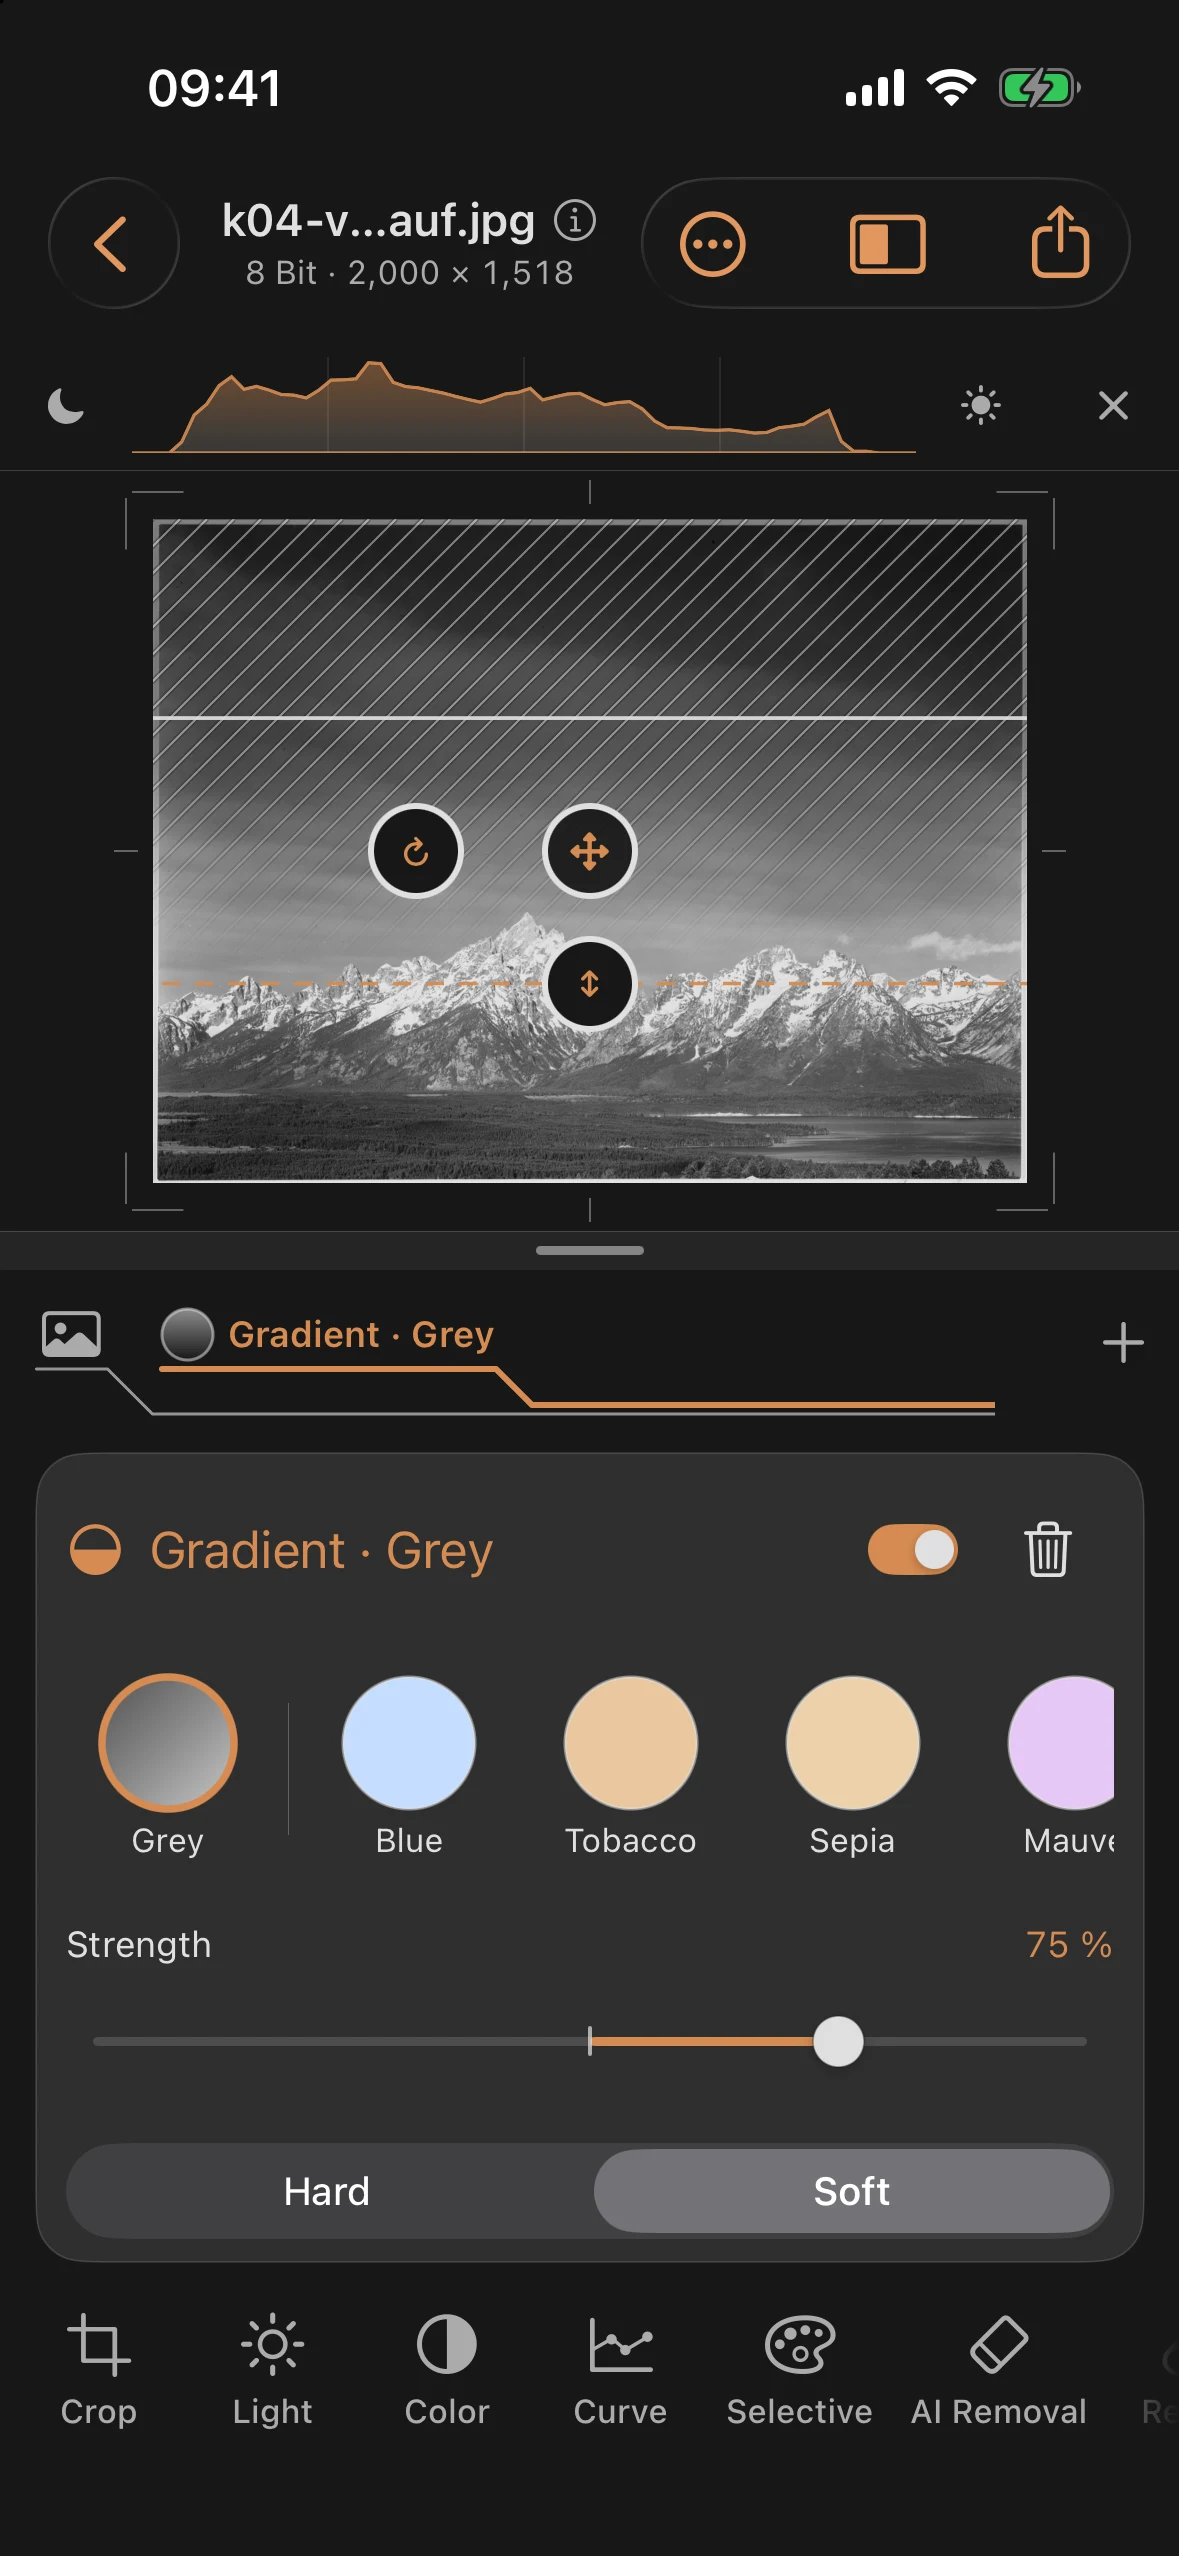
Tap + in the layer ribbon, choose Filter, then Graduated and the color Grey. Leave Edge on Soft. You set position, angle, and transition zone directly on the image: drag the transition edge so it sits on the mountain silhouette and the falloff runs soft over the peaks — here with a transition width of 40%. Strength sits at 75%.
The sky immediately gains density and the cloud veils become visible, while the lake and forest stay exactly as they were — the filter’s effect ends at the transition, just like glass in front of a lens. Multiple filters can even be stacked as reversible layers, just like real slot-in filters.
Step 3: The Finish
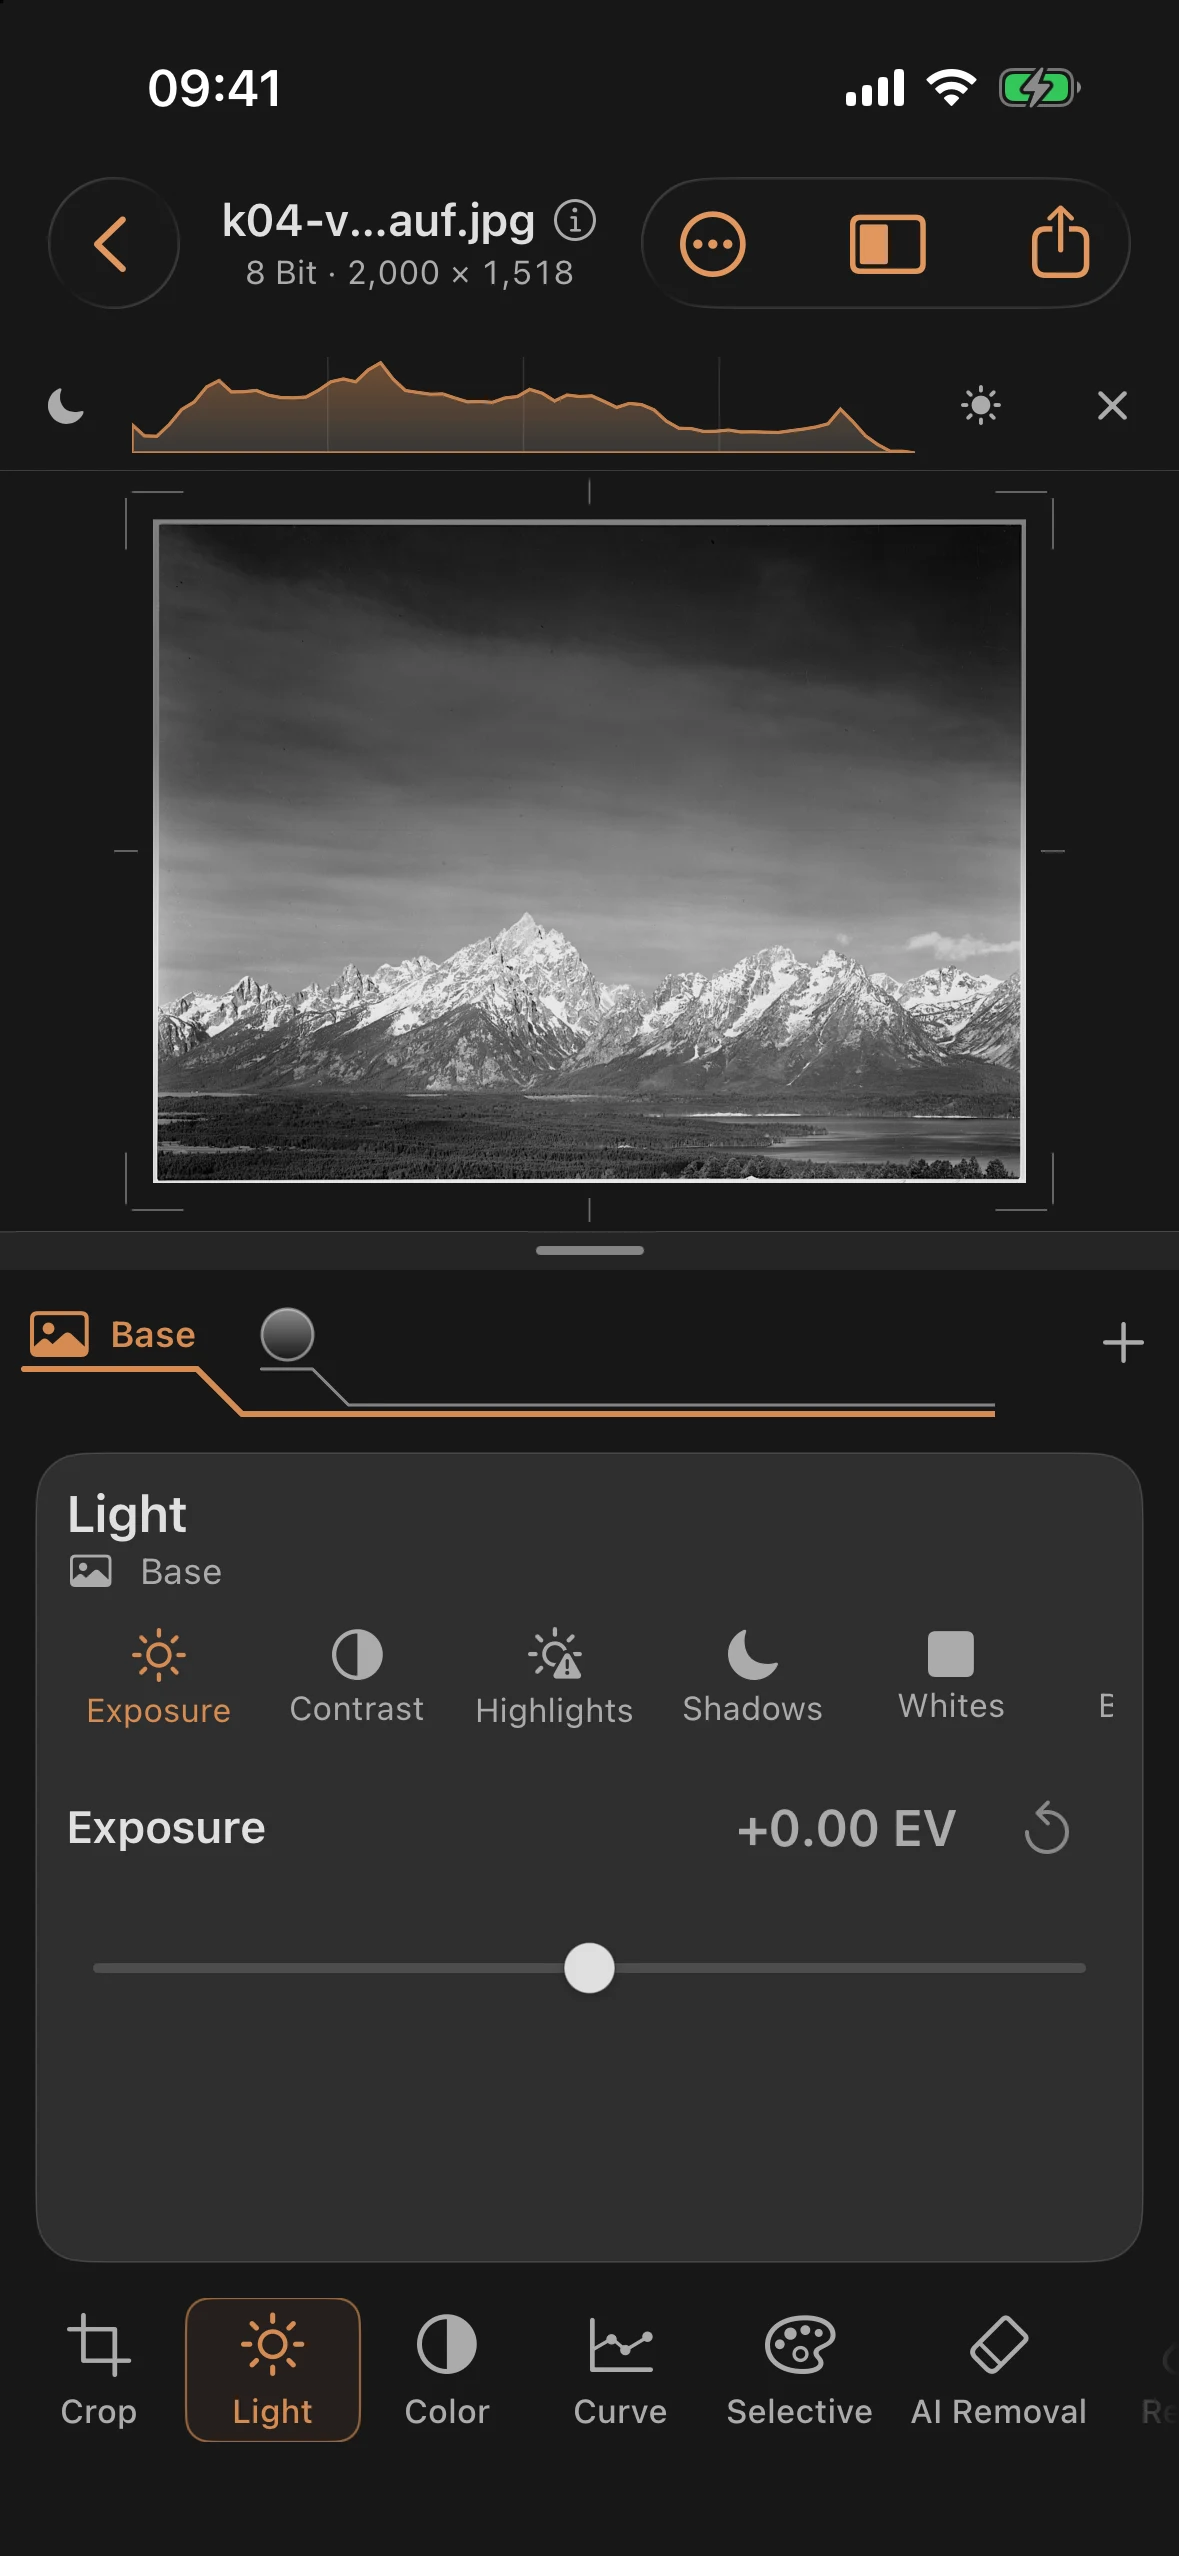
To finish, select Base and give the overall image some grounding: Contrast +15 and Blacks −15 in the Light tool, plus Structure +18 in Details for the rock and forest textures. Small values — the filter already did the heavy lifting.
Before and after
Before
After
The difference from the mask in Chapter 2: the graduated filter is an optic with a fixed character — quick to set, and always neutral in grey. To tint the sky instead, pick Blue or Tobacco rather than Grey. The mask is the workbench — every slider, every curve, every shape. Together, the two cover almost any sky.