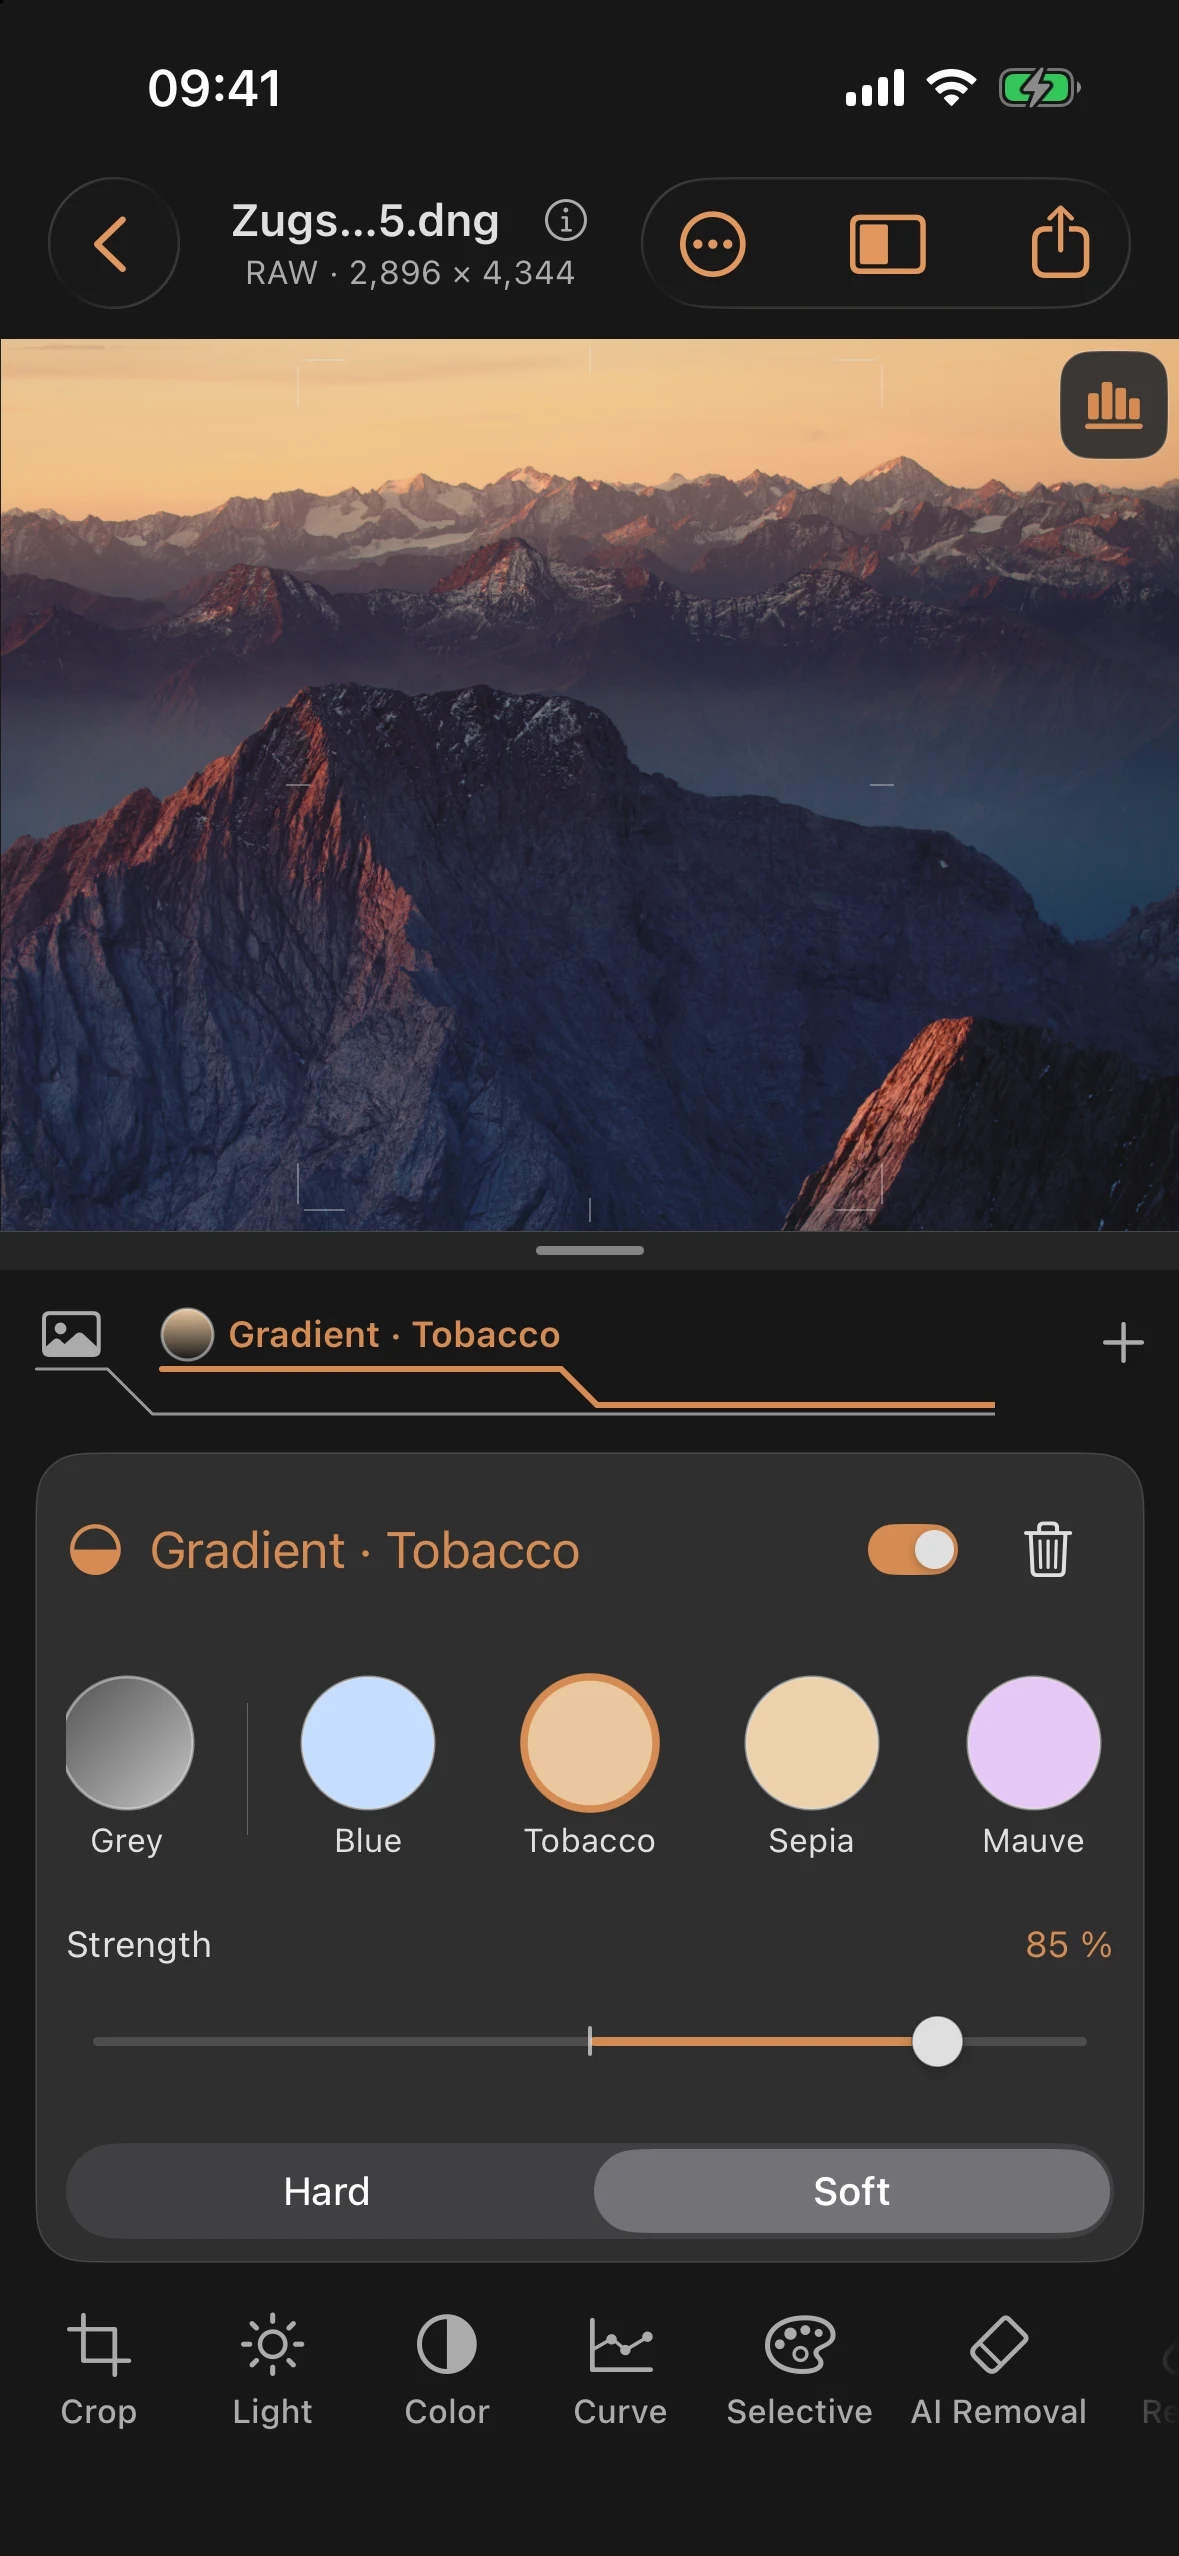
Filter: The Optical Filter Cartridge
You add filters with the + on the right of the layer ribbon: tap New layer and choose Filter. The “Optical Filter Cartridge” panel opens, subtitled “Inspired by Analog”:
“Choose a virtual drop-in or screw-on filter effect. Several filters can be stacked as reversible layers.”
Every filter becomes a layer of its own in the layer ribbon, drawn as colored glass: a solid circle for full filters, a circle with a color gradient for graduated filters. Tap it to reopen the filter. Filter no longer appears in the tool rail.
Three filter types
At the top of the cartridge you pick the Filter type:
| Filter type | Effect | Examples |
|---|---|---|
| Full | tints the whole image like glass in front of the lens | Warm, Cool, Sepia, contrast filters, Polarizer |
| Graduated | acts on part of the image only and fades out softly or hard | Grey for the sky, Blue, Tobacco, Sunset |
| Creative | shapes the light of bright light sources | Star, Spectral Star, Light Fan, Halation, Diffusion |
Full filters
A full filter works like evenly tinted glass. The colors come in groups:
| Group | Colors |
|---|---|
| Warm | Warm 1 to Warm 5 (81A, 81B, 81C, 81EF, 85B) |
| Cool | Cool 1 to Cool 5 (82A, 82B, 80C, 80B, 80A) |
| Toning | Sepia, Tobacco, Gold, Fluorescent (FL) |
| Contrast | Yellow (8), Orange (21), Red (25), Green (11) |
The codes under the warm and cool steps follow the usual conversion filters of film photography. The steps are calculated from mired values and rise evenly. The contrast filters are meant for black and white: yellow and orange darken the sky, red does so strongly, green lightens foliage.
Exposure compensation: Real filter glass swallows light, so the camera meters through the lens and exposes longer. New full filters do the same. The color changes, the brightness stays. This also holds when several full filters are stacked.
The Polarizer is listed under Full as well. It is described in its own section below.
Graduated filters
A graduated filter tints or darkens part of the image only, typically the sky. When you add one, it hangs like its physical counterpart: filtered at the top, clear at the bottom.
| Group | Colors |
|---|---|
| Neutral | Grey (a pure grey gradient that darkens without tinting) |
| Sky | Blue, Tobacco, Sepia, Mauve, Rose, Emerald, Yellow, Sunset |
| Vivid | Vivid yellow, Vivid orange, Vivid red, Vivid blue, Vivid violet, Vivid pink |
Below the color row are two switches:
- Edge: Hard for a crisp transition, such as a sea horizon, Soft for mountains and uneven horizons.
- Form: Normal gets denser towards the top. Reverse is densest on the centre line and fades out towards the top. It suits sunsets, where the brightest band sits right above the horizon.
Position, angle and flow range have no sliders. You set them directly in the image with a gesture:
“Set position, angle, and flow range directly in the image.”
Changing the color
With a full or graduated filter open, a color row shows every color of its type, with the current one outlined. Tap another color to re-tint the same filter; strength, position and edge stay as they are. Add another filter creates a new layer instead.
Creative filters and the light principle
Creative filters work with light. Star, Spectral Star, Light Fan and Halation respond only to bright light sources, in proportion to their brightness: a street lamp flares strongly, a light grey wall not at all. The image itself is not softened. The rays take on the color of their light source.
In JPEGs, bright lamps are often clipped to plain white. The app detects small, compact points of light and gives them back the energy a real lamp would have, taking the color from the glow around the lamp. Large bright areas such as sky or snow are left alone.
| Filter | Effect | Own controls |
|---|---|---|
| Star | rays around every bright light source | Rays (2, 4, 6, 8 or 16), Angle, Length, Soft |
| Spectral Star | rays that fan out into rainbow colors | Axes (One, Three, Crown), Angle, Length |
| Light Fan | a fan of light beams, curved if you like | Rays (6 to 20), Fan spread, Curvature, Angle, Length |
| Halation | a red-orange glow around bright lights, like film without an anti-halation layer | – |
| Diffusion | a soft, luminous glow across the whole image | – |
Controls
| Control | Range | Default | Applies to |
|---|---|---|---|
| Strength / Polarizer effect | 0 … 100% | 50% | all filters; shared master strength for the polarizer |
| Reflection contribution | 0 … 100% | 100% | polarizer, under Fine tuning, which starts closed |
| Angle | −180° … +180° | 0° | Star, Spectral Star, Light Fan |
| Length | 3 … 40% | 12% | Star, Spectral Star, Light Fan |
| Soft | 0 … 100% | 0% | Star |
| Rays | 6 … 20 | 14 | Light Fan |
| Fan spread | 0.20 … 1.60 rad | 1.20 rad | Light Fan |
| Curvature | −1 … +1 | 0 | Light Fan |
| Highlight threshold | 35 … 95% | 72% | Star, Spectral Star, Light Fan, Halation |
The highlight threshold sets how bright a spot has to be to count as a light source. A lower value lets weaker lights respond as well.
RAW difference: none.
Stacking
You can use several filters at once. They sit on top of each other as reversible layers, each with its own strength. For example, combine a grey graduated filter for the sky with a light Warm 1 for the whole image. The layer profile beneath the tabs shows the order: the base at the bottom, each filter above it in its own color.
Older projects
Projects from earlier versions look unchanged. The former Graduated ND becomes Gradient · Grey, the Sepia Gradient becomes Gradient · Sepia, Sepia Toning becomes Full · Sepia and Tobacco becomes Full · Tobacco. The former warming and cooling filters are now called Classic warm and Classic cool; they can no longer be chosen for new filters. Saved full filters keep their old brightness. Exposure compensation only applies once you change their color.
Older Star and Halation filters show Update filter. It switches them to the new light model; Undo restores the previous state.
Polarizer: color effect and reflection reduction
The optical component targets blue and cyan without a general contrast increase. Reflection analysis is prepared automatically on your device; no separate analysis or model-download button is needed. Slider changes reuse the saved result instead of running the model again.
Polarizer effect controls both components together. Open Fine tuning directly below it to adjust Reflection contribution. This is a fraction of the master amount: 80% master strength × 50% contribution gives 40% reflection correction. Both at 100% match the previous maximum standalone correction. Master strength at 0% disables both effects; contribution at 0% keeps only the optical color effect.
Under Region, choose Entire Image, an existing mask, or Detect Sky. The region and enable switch apply to both components. Sky detection runs entirely on your device and creates a sky mask in the layer ribbon. The mask follows straightening and perspective corrections. Edit Mask lets you inspect its coverage, adjust opacity and feathering, or invert it.
Color selection alone can also affect blue objects. A sky mask limits the effect spatially; check fine building details and unusually textured clouds. If no clear sky is detected, use your own brush, radial, or linear mask.
Deleting or disabling the linked mask pauses the filter. Choose another region or restore the mask with Undo.
Previously saved polarizers initially keep their appearance. Update Polarizer adds the new function to older optical-only variants. For older filters that already linked reflection reduction, adjusting the master or contribution switches to the new, stronger scale. Undo restores the previous edit. Existing standalone corrections remain accessible under Previous reflection correction.
Reflection analysis is intended for photos taken through glass. It may alter ordinary scene details, and high amounts can cause artifacts. Reduce the contribution or limit the region if needed. This is not a physically exact optical polarizer and does not guarantee recovery of hidden or clipped detail. See the Reflections chapter.
Practical tips
- With a graduated filter, set angle and position in the image before fine-tuning the strength. The gesture decides where the transition sits, the strength only how strong it is.
- Light filters are hard to judge when the image is bright overall. Briefly pull the middle of the Curve down to see how far the rays really reach.
- A Star with 4 rays and a little Soft looks calmer on city lights than 8 or 16 hard rays.
- Chapter 4 of the tutorial series covers the graduated filter on the sky, chapter 7 toning with sepia and warming filters.
- For a subtle analog look, a light Warm 1 with some Diffusion is often enough. Together they look more subtle than either one at high strength.