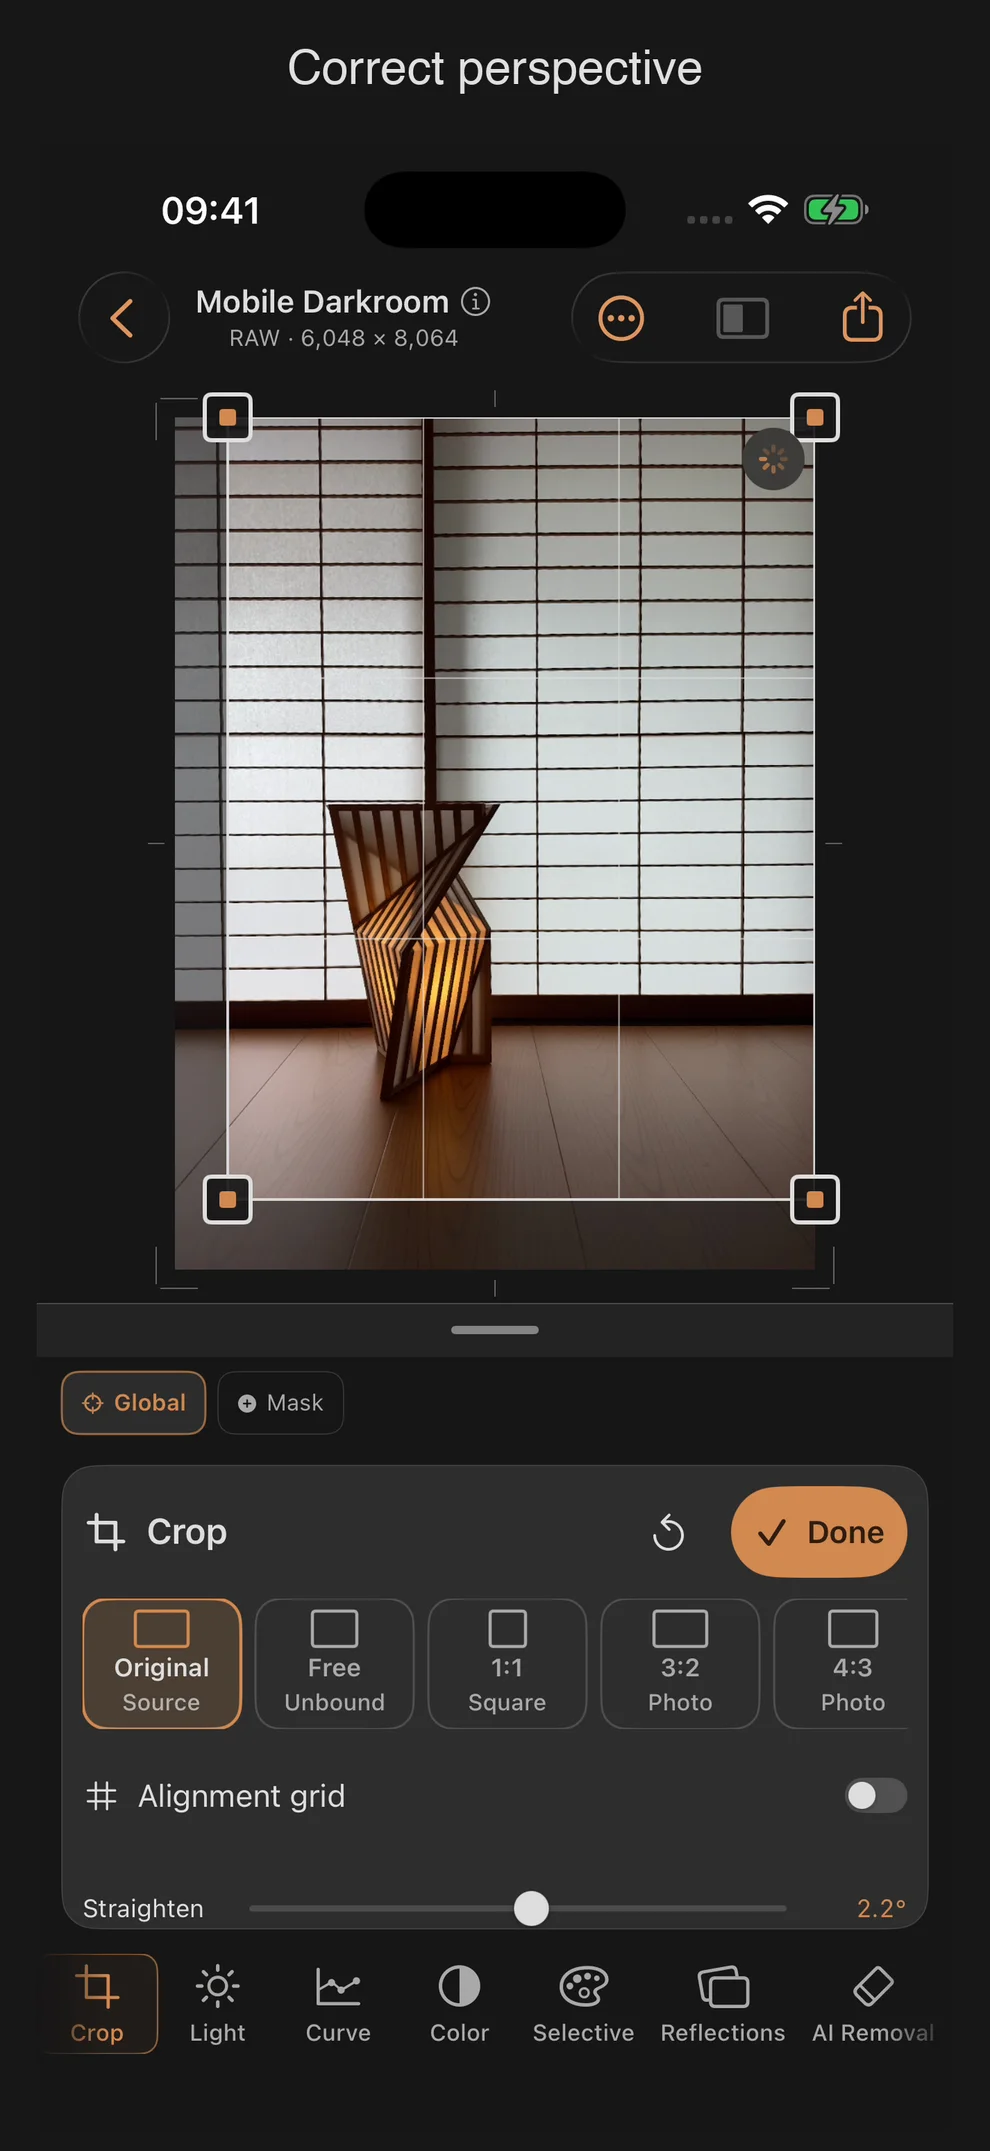
Crop: Cropping, Straightening, and Keystone
The Crop tool is pure geometry: it crops the image, straightens it, and corrects perspective distortion. All three controls, as well as the presets, work the same regardless of whether the image is RAW or JPEG/HEIF.
Controls
| Control | Range | Default | Effect |
|---|---|---|---|
| Straighten | −45° to +45° | 0° | Rotates the image to level the horizon |
| Vertical (Keystone) | −100 to +100 | 0 | Corrects converging lines in the vertical direction |
| Horizontal (Keystone) | −100 to +100 | 0 | Corrects converging lines in the horizontal direction |
The order of operations in rendering is fixed: keystone correction first, then rotation, and finally an automatic zoom that fills in the empty edges both of those create.
Crop presets
Nine aspect-ratio presets sit in a horizontally scrollable chip bar above the image:
| Preset | Subtitle | Aspect ratio |
|---|---|---|
| Original | Source | The source image’s aspect ratio |
| Free | Unbound | No fixed ratio |
| 1:1 | Square | 1.0 |
| 3:2 | Photo | 3:2 (landscape base) |
| 4:3 | Photo | 4:3 |
| 16:9 | Widescreen | 16:9 |
| 4:5 | Feed | 5:4 (portrait base) |
| 9:16 | Story · Reel | 16:9 (portrait base) |
| 1.91:1 | Social landscape | 1.91:1 |
For every preset except Original, Free, and 1:1, there’s a dedicated rotate button that switches between portrait and landscape orientation.
Using it
Dragging the corners changes the crop frame; dragging the frame itself repositions it — the panel’s footer continuously shows the live pixel dimensions (for example, “4032 × 3024”). The “Done” button applies the crop; per the accessibility hint text, it remains editable afterward.
Warning for location-bound edits: If masks, repairs, a focus point, or gradient filters already exist, the panel shows:
“Masks, repairs, focus point, and gradient filters stay at their image position.”
In practice, that means these location-bound elements don’t automatically travel along when you change the crop — after cropping, check whether your masks and repairs still sit where you want them.
Practical tips
- Apply Crop early in the edit where possible, before creating masks or repairs — that keeps their position predictable in the final crop.
- For converging lines on buildings, a small Vertical value is usually enough — larger corrections visibly create more empty edge that the automatic zoom has to compensate for.
- Chapter 8 of the tutorial series (“The Crop: Straightening and Converging Lines”) walks through straightening and keystone correction step by step on a real example.
- “Original” as a preset is the fastest way to undo an accidental crop and return to the full source image.
Alignment grid
Enable Alignment grid for a denser reference when straightening or correcting perspective. Its lines remain horizontal and vertical as the image changes. Light lines with dark outlines remain visible on both bright and dark subjects. The grid is a viewing aid and does not appear in exported images.