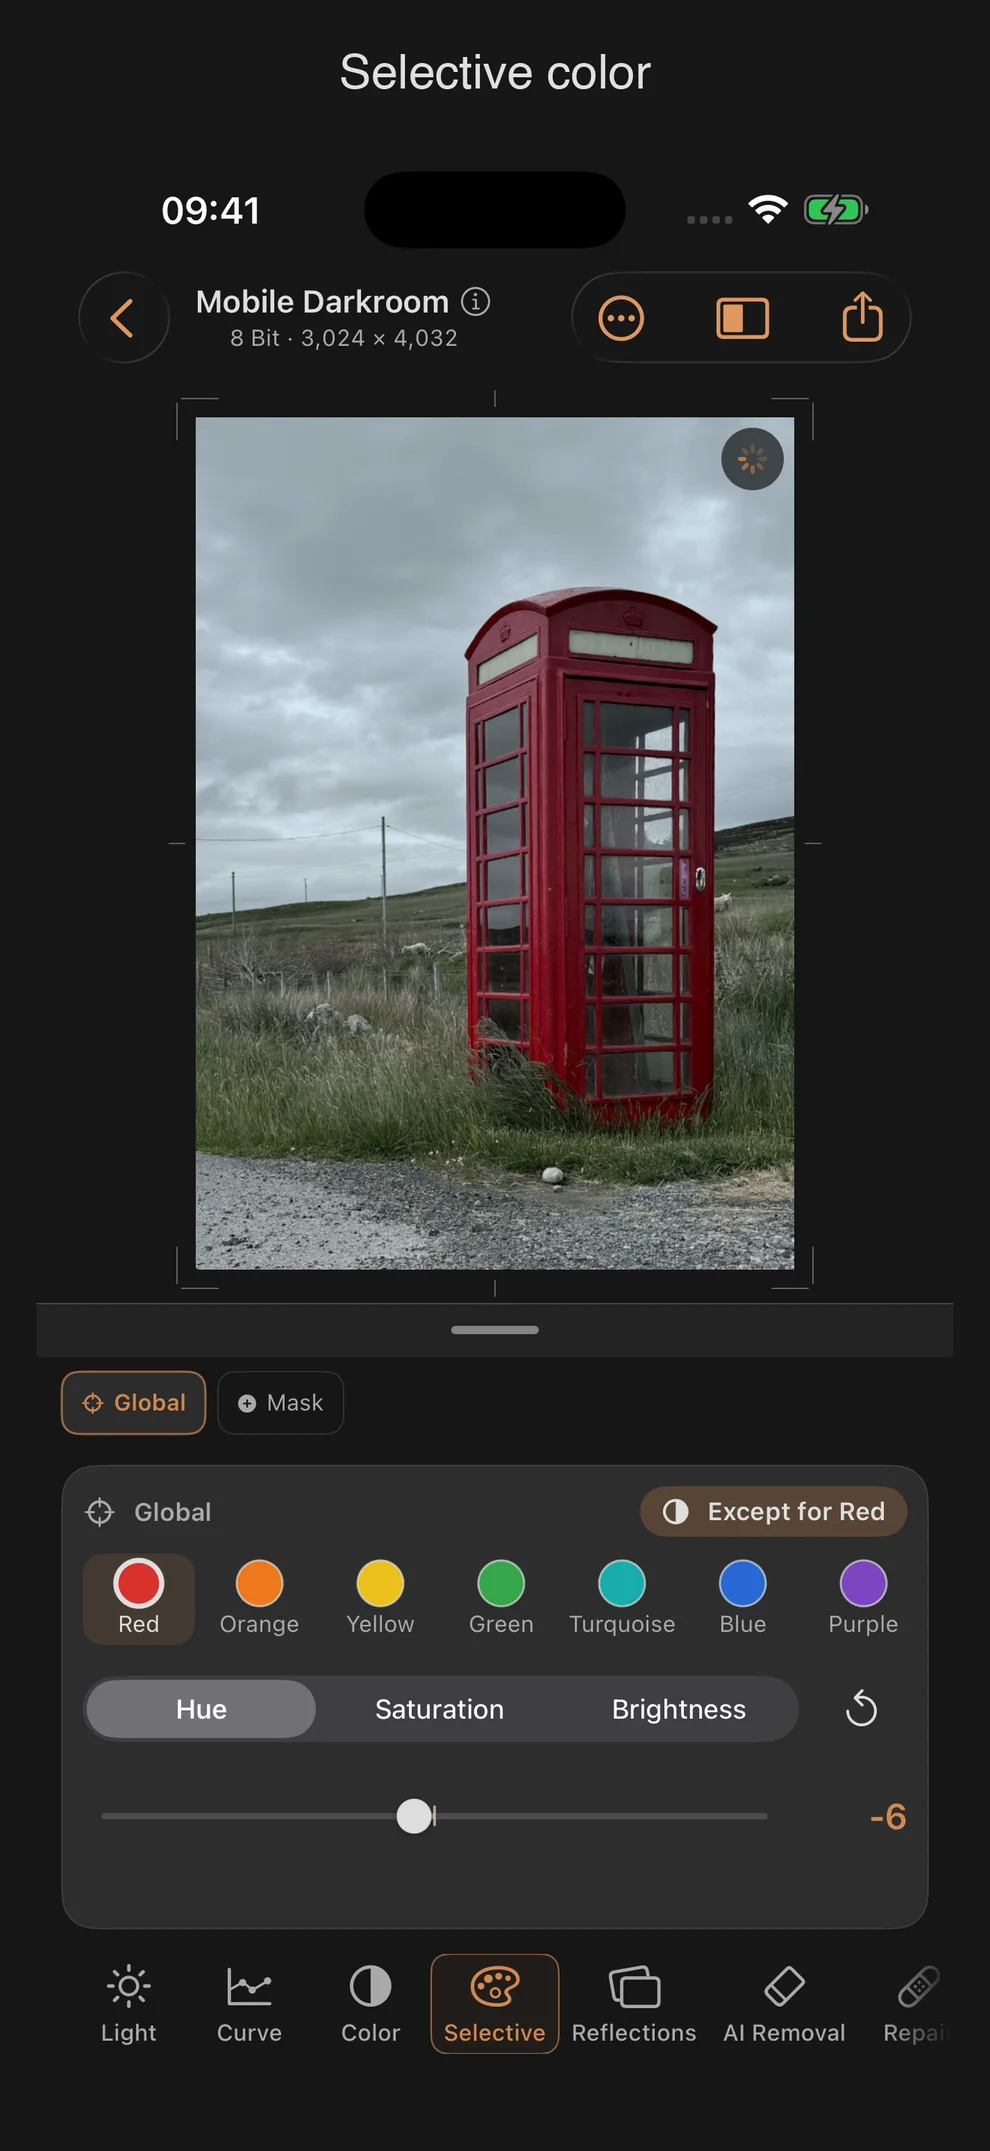
Selective: Adjusting Individual Color Bands
The Selective tool targets individual color ranges instead of acting on the whole image the way the Color tool does. You pick a color band first, then a parameter, then move the value.
Layout
- The header shows the scope (Base or the active mask) plus the invert button.
- Below it is a horizontally scrollable color-band selector with eight swatches.
- A segmented picker selects the color parameter (Hue, Saturation, Brightness) for the currently chosen band.
- A single slider shows and changes the value for the current band-and-parameter combination.
The eight color bands
Red · Orange · Yellow · Green · Turquoise · Blue · Purple · Magenta
The three parameters per band
| Parameter | Range | Default | Effect |
|---|---|---|---|
| Hue (Selective) | −100 to +100 | 0 | Shifts the hue within the selected band |
| Saturation | −100 to +100 | 0 | Strengthens or weakens the band’s intensity |
| Brightness | −100 to +100 | 0 | Lightens or darkens the band |
Each of the eight bands has its own three values — 24 independent settings in total, even though only one slider is visible in the panel at a time.
No difference between RAW and JPEG/HEIF
Unlike Light, Color, or Details, Selective isn’t governed by the narrower non-RAW window. Its values are always clamped to −100 to +100, regardless of image format.
Naming collision: “Hue”
The first parameter is called “Hue” — the same name as the white-balance control in the Color tool. There, “Hue” shifts the green-magenta axis of the whole image; here, “Hue” shifts the hue within a single selected band (for example, nudging Red toward Orange). Two different controls, same name — where it matters, this manual adds “(White Balance)” or “(Selective)” to tell them apart.
Inverting
Each band has its own invert button. It toggles between “Only” and “Except” — with the “Red” band selected, that’s “Only Red” versus “Except Red.” Inverted, the setting acts on every color except the one selected, instead of on the selected color itself.
Resetting
- One band: “Reset Only [Color]” in the context menu resets all three parameters of the currently selected band.
- All bands: “Reset All Colors” in the same context menu sets all 24 values to zero.
- As with most controls, double-tapping the numeric value also resets the currently visible slider.
Practical tips
- For skin tones, a slightly reduced Saturation on Red and Orange, combined with a small Brightness lift, usually works well — finer control than a global saturation change.
- Use Invert to mute everything except one color instead of editing every other band individually — for example, “Except Green” for an image where only the foliage should stay strong.
- Chapter 5 of the tutorial series shows Selective working together with Film Stock, to control individual color ranges before the film-negative simulation.
- Since Selective always offers the full range regardless of image format, it’s especially worth using on JPEG/HEIF as a complement to the narrower non-RAW windows of Light and Color.