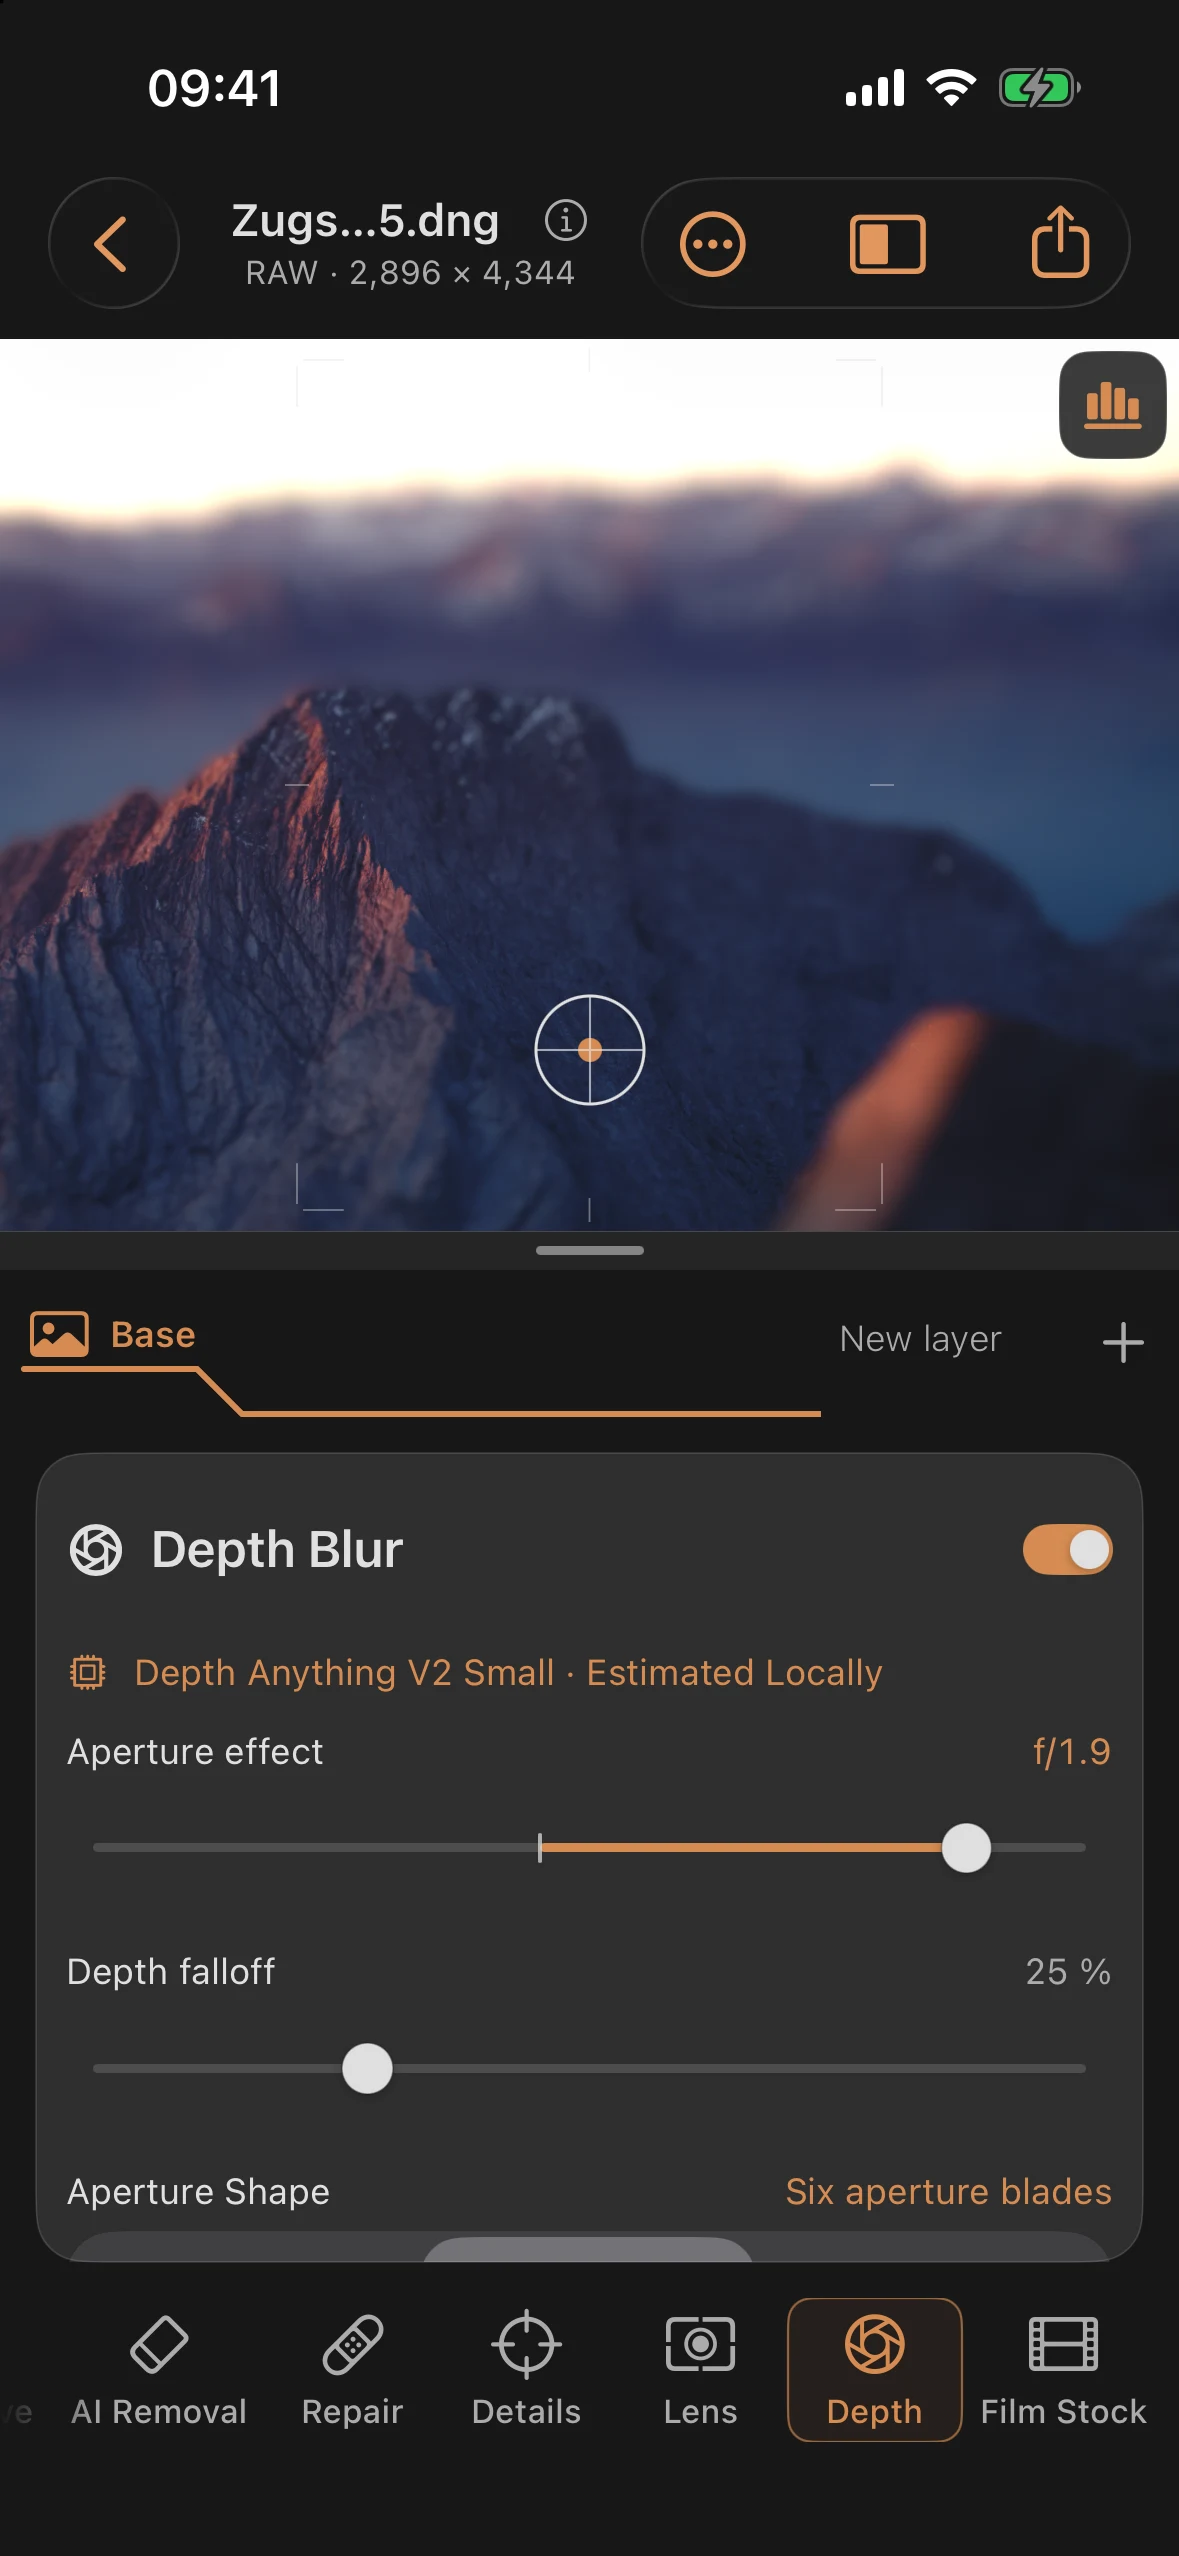
Depth: Simulated Depth of Field
The Depth tool simulates a depth of field that wasn’t there at capture, or strengthens one that was. It needs a depth map to do this — without one, all controls stay hidden.
Depth sources
| Source | Origin |
|---|---|
| Recorded | embedded disparity/depth map from the photo itself |
| AI-estimated | computed locally on-device with Depth Anything V2 Small |
The switch between the two sources only appears when a recorded depth map exists. If there isn’t one, the app estimates automatically whenever no embedded map is present.
Important: the AI-estimated depth map is explicitly an estimate, not a measurement. While it’s being computed, the app shows:
“Depth Anything V2 Small runs entirely on this device. You can keep editing the photo while it works.”
If no depth source exists at all:
“This image contains no recorded depth data. Local estimation isn’t available yet.”
If the estimate fails, “Depth Estimation Not Possible” appears with an individual error message and a “Try Local Estimate Again” button.
Setting focus
“Tap or drag directly in the image to set focus”
Controls
All eight controls are only visible when a depth map is present:
| Control | Range | Default | Effect |
|---|---|---|---|
| Aperture effect | f/16 to f/1.4 | ≈f/5.3 | Strength of the simulated depth of field (see below) |
| Depth falloff | 4 to 80% | 25% | How smoothly sharpness transitions into blur |
| Aperture Shape | 3 shapes | Round | Shape of the blur circles in the highlights |
| Blade angle | −180° to +180° | 0° | Rotation of the aperture blades (non-round shapes only) |
| Bokeh profile | −100 to +100 | 0 (Even) | Brightness distribution inside each blur circle, from its center to its rim |
| Bokeh highlights | 0 to 100% | Off (0%) | Boost for bright blur circles in the out-of-focus areas |
| Highlight threshold | 0 to 100% | 45% | Brightness at which a highlight gets boosted into a blur circle |
| Bokeh softness | 0 to 100% | 70% | Softness of the blur circles |
RAW difference: none — all eight controls run over the same range regardless of image format.
Aperture effect as an f-number
Instead of an abstract percentage, “Aperture effect” displays an f-number directly, calculated between f/16 (almost no blur) and f/1.4 (strong blur):
| Control position | Displayed f-number |
|---|---|
| 0% | f/16 |
| 45% (default) | ≈f/5.3 |
| 100% | f/1.4 |
Saving your own defaults
Save as my default stores the optical settings for newly imported photos and as their reset values. Activation, focus point, and depth source are not included; existing projects keep their settings. The adjacent menu offers Use app default for new photos to return to the original baseline. The tables above show those app defaults.
Aperture shapes
| Shape | Description |
|---|---|
| Round | round-approximated blur circles |
| “6” | six aperture blades |
| “8” | eight aperture blades |
Depth vs. Lens: two separate bokeh mechanics
The three internal render parameters for swirl, soap-bubble, and anamorphic bokeh (swirl, bubble, squeeze) do not belong to this tool — they’re controlled exclusively through the Lens tool (the “Swirl 58,” “Soap Bubble,” and “Anamorphic” presets, plus the expert “Bokeh” control). Depth provides its own, separate bokeh control for the depth of field itself (aperture shape, angle, profile, highlights, threshold, softness). When both are active, the app says they work together.
False-color view
A “Show Depth Map in False Color” toggle overlays the depth map itself, with a color legend running from “Far” to “Near” — useful for checking whether the depth map correctly separates your subject from the foreground and background before you fine-tune the controls.
Blur at object edges
Rendering separates the image into depth layers and composites them from back to front. An out-of-focus object is blurred along with its outline; a sharp edge in the depth map should not leave a sharp silhouette in an otherwise blurred background.
This cannot replace optical capture: glass, transparency, fine hair, and incorrectly estimated depth can still produce artifacts. Hidden background is extended from neighboring pixels, not recovered from the photo. Inspect critical edges at a larger zoom and reduce Aperture effect if necessary. For targeted softening without a depth map, use Details → Blur, including inside a mask.
Export lock
If depth blur is turned on but no depth map is available (for example because the estimate is still running), export is blocked with its own error message — see the “Export” chapter.
Practical tips
- Check the false-color view first to see whether the depth map cleanly separates your subject from the background before you touch aperture effect — an inaccurate map shows up immediately there.
- For a classic portrait bokeh, a mid-range aperture effect (f/4–f/5.6) with a round aperture shape is usually enough — extreme values like f/1.4 look artificial quickly if the depth map isn’t perfect.
- Combine Bokeh highlights with a lower Highlight threshold to produce pronounced bokeh circles in an image with lots of small light sources (like string lights in the background).
- Chapter 10 of the tutorial series (“What the Darkroom Couldn’t Do: Choosing Depth”) walks through the interplay of recorded and AI-estimated depth on a sample image.